

You are about to set up a Crypto Mining Computer. It’s a lot like, but quite a bit different from a regular desktop computer. Please read all of this document at least once before proceeding. Thank you!
This page is self-adjusting for desktop, mobile and smartphones:
https://hawaiiactivitymarketing.com/miner-02-setup/
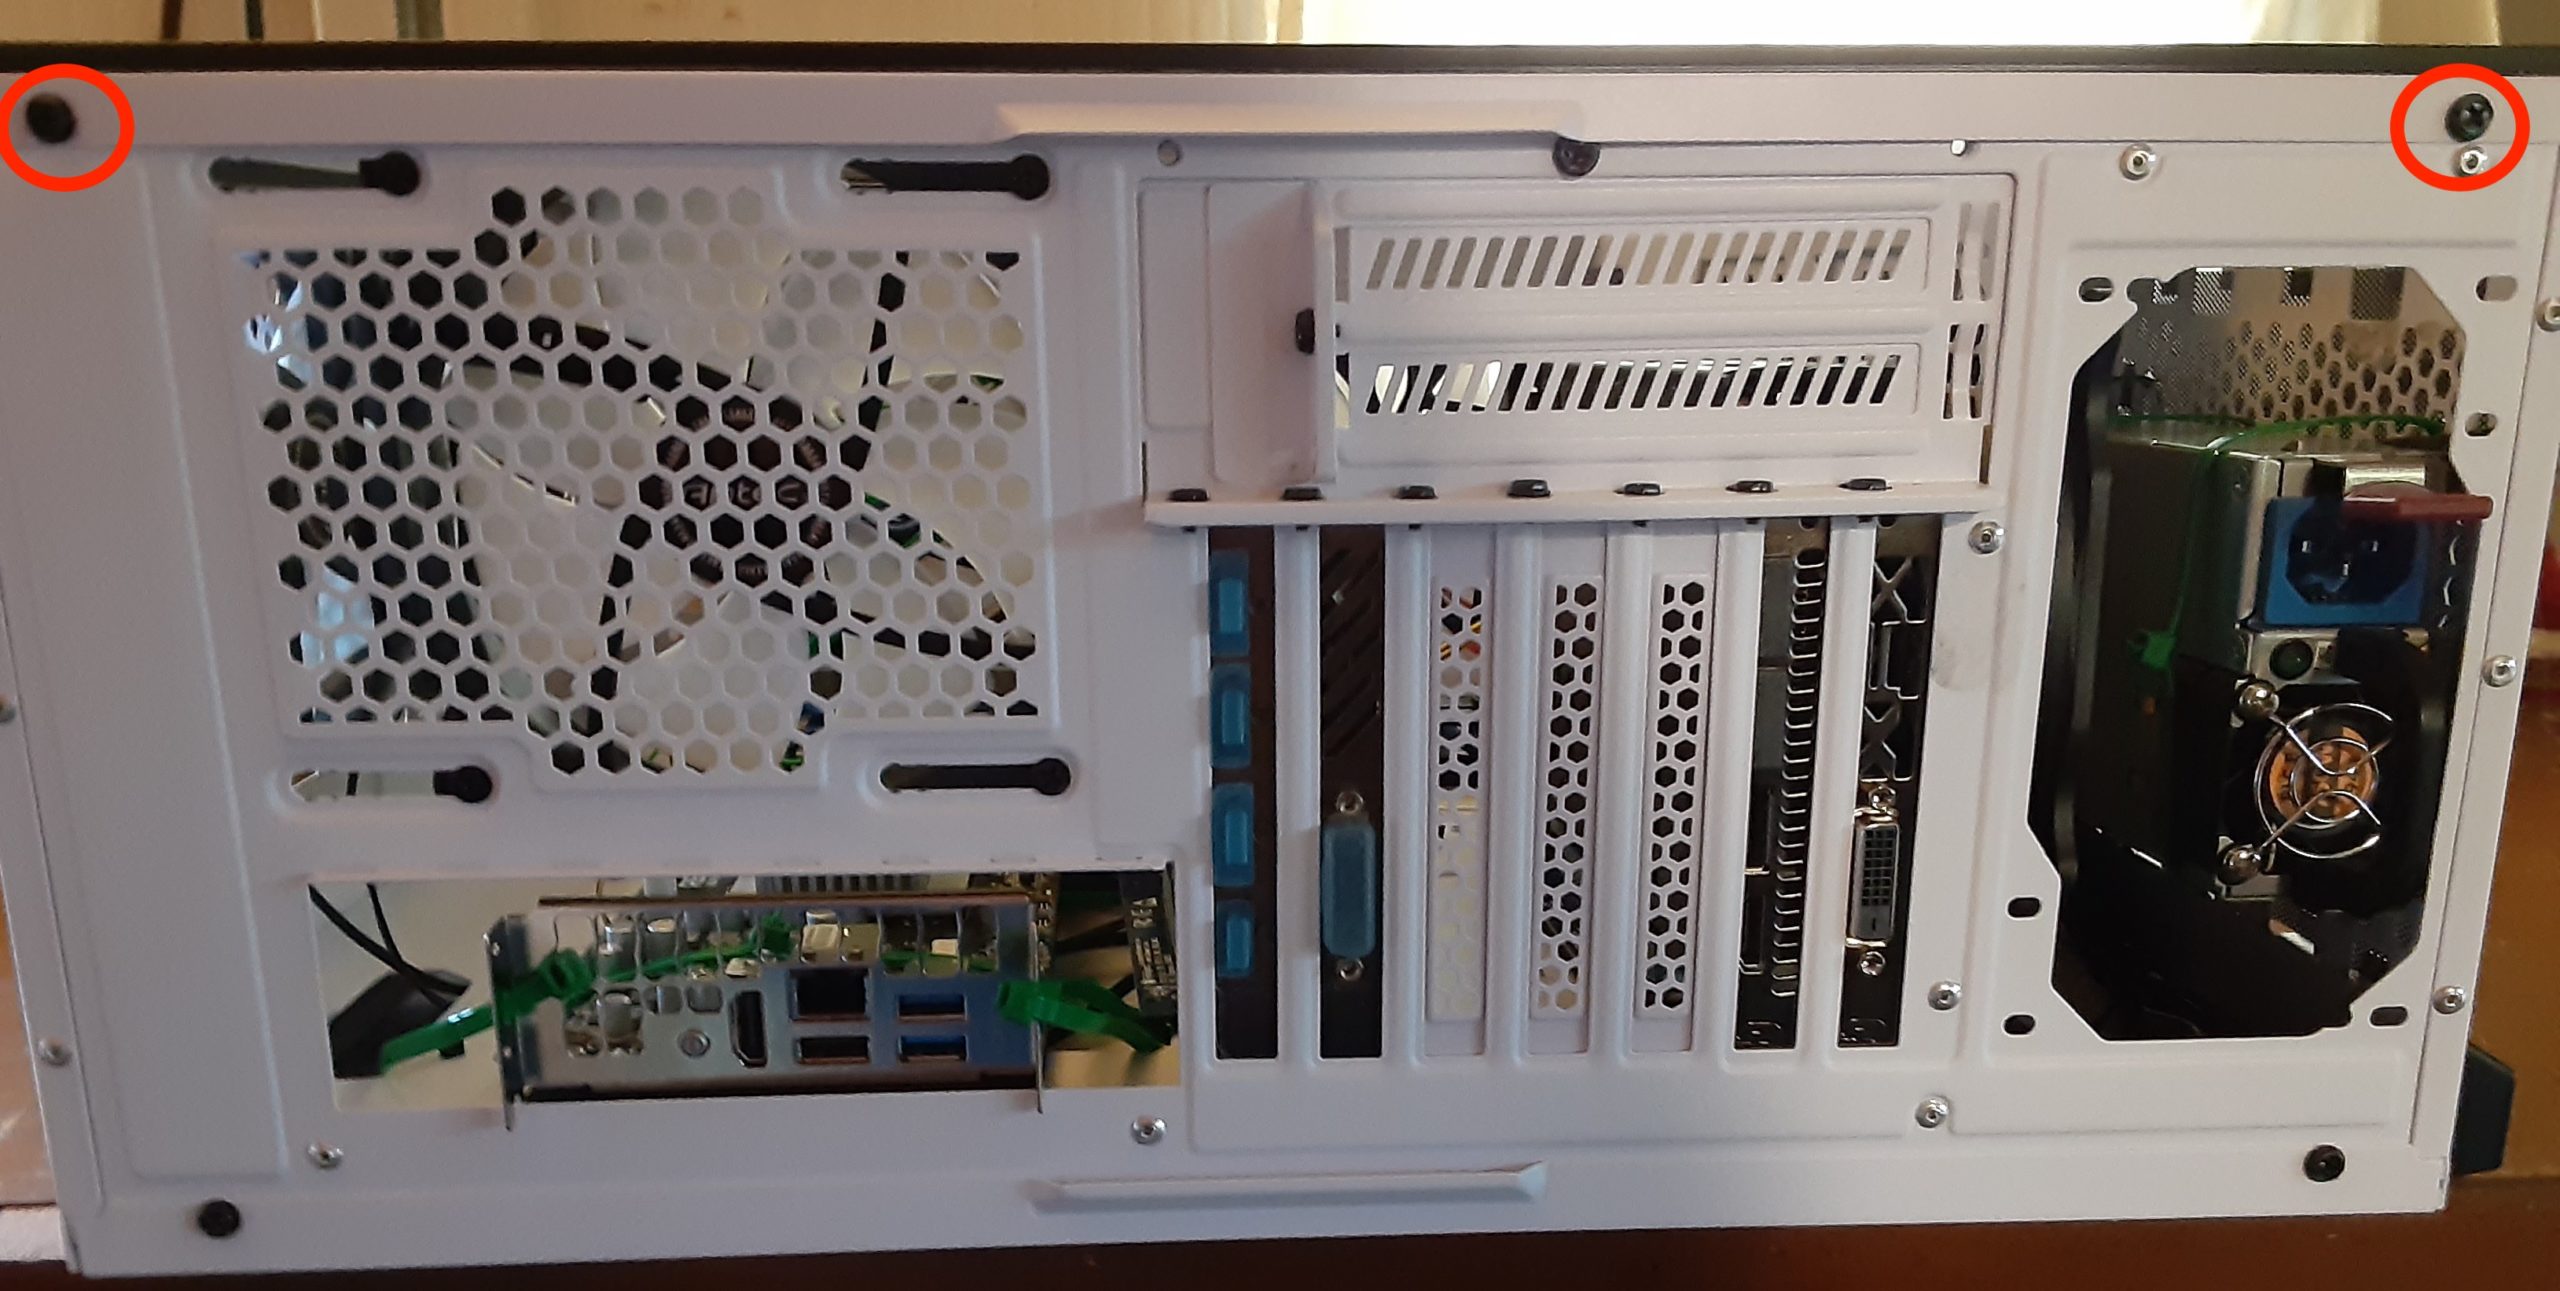
- Lay the case on its side, tempered glass up, and remove the two screws. Carefully slide it free and put it aside.
- Remove all of the packing material inside of the case, including the piece of bubble wrap behind the slot on the side, atop the power supply.
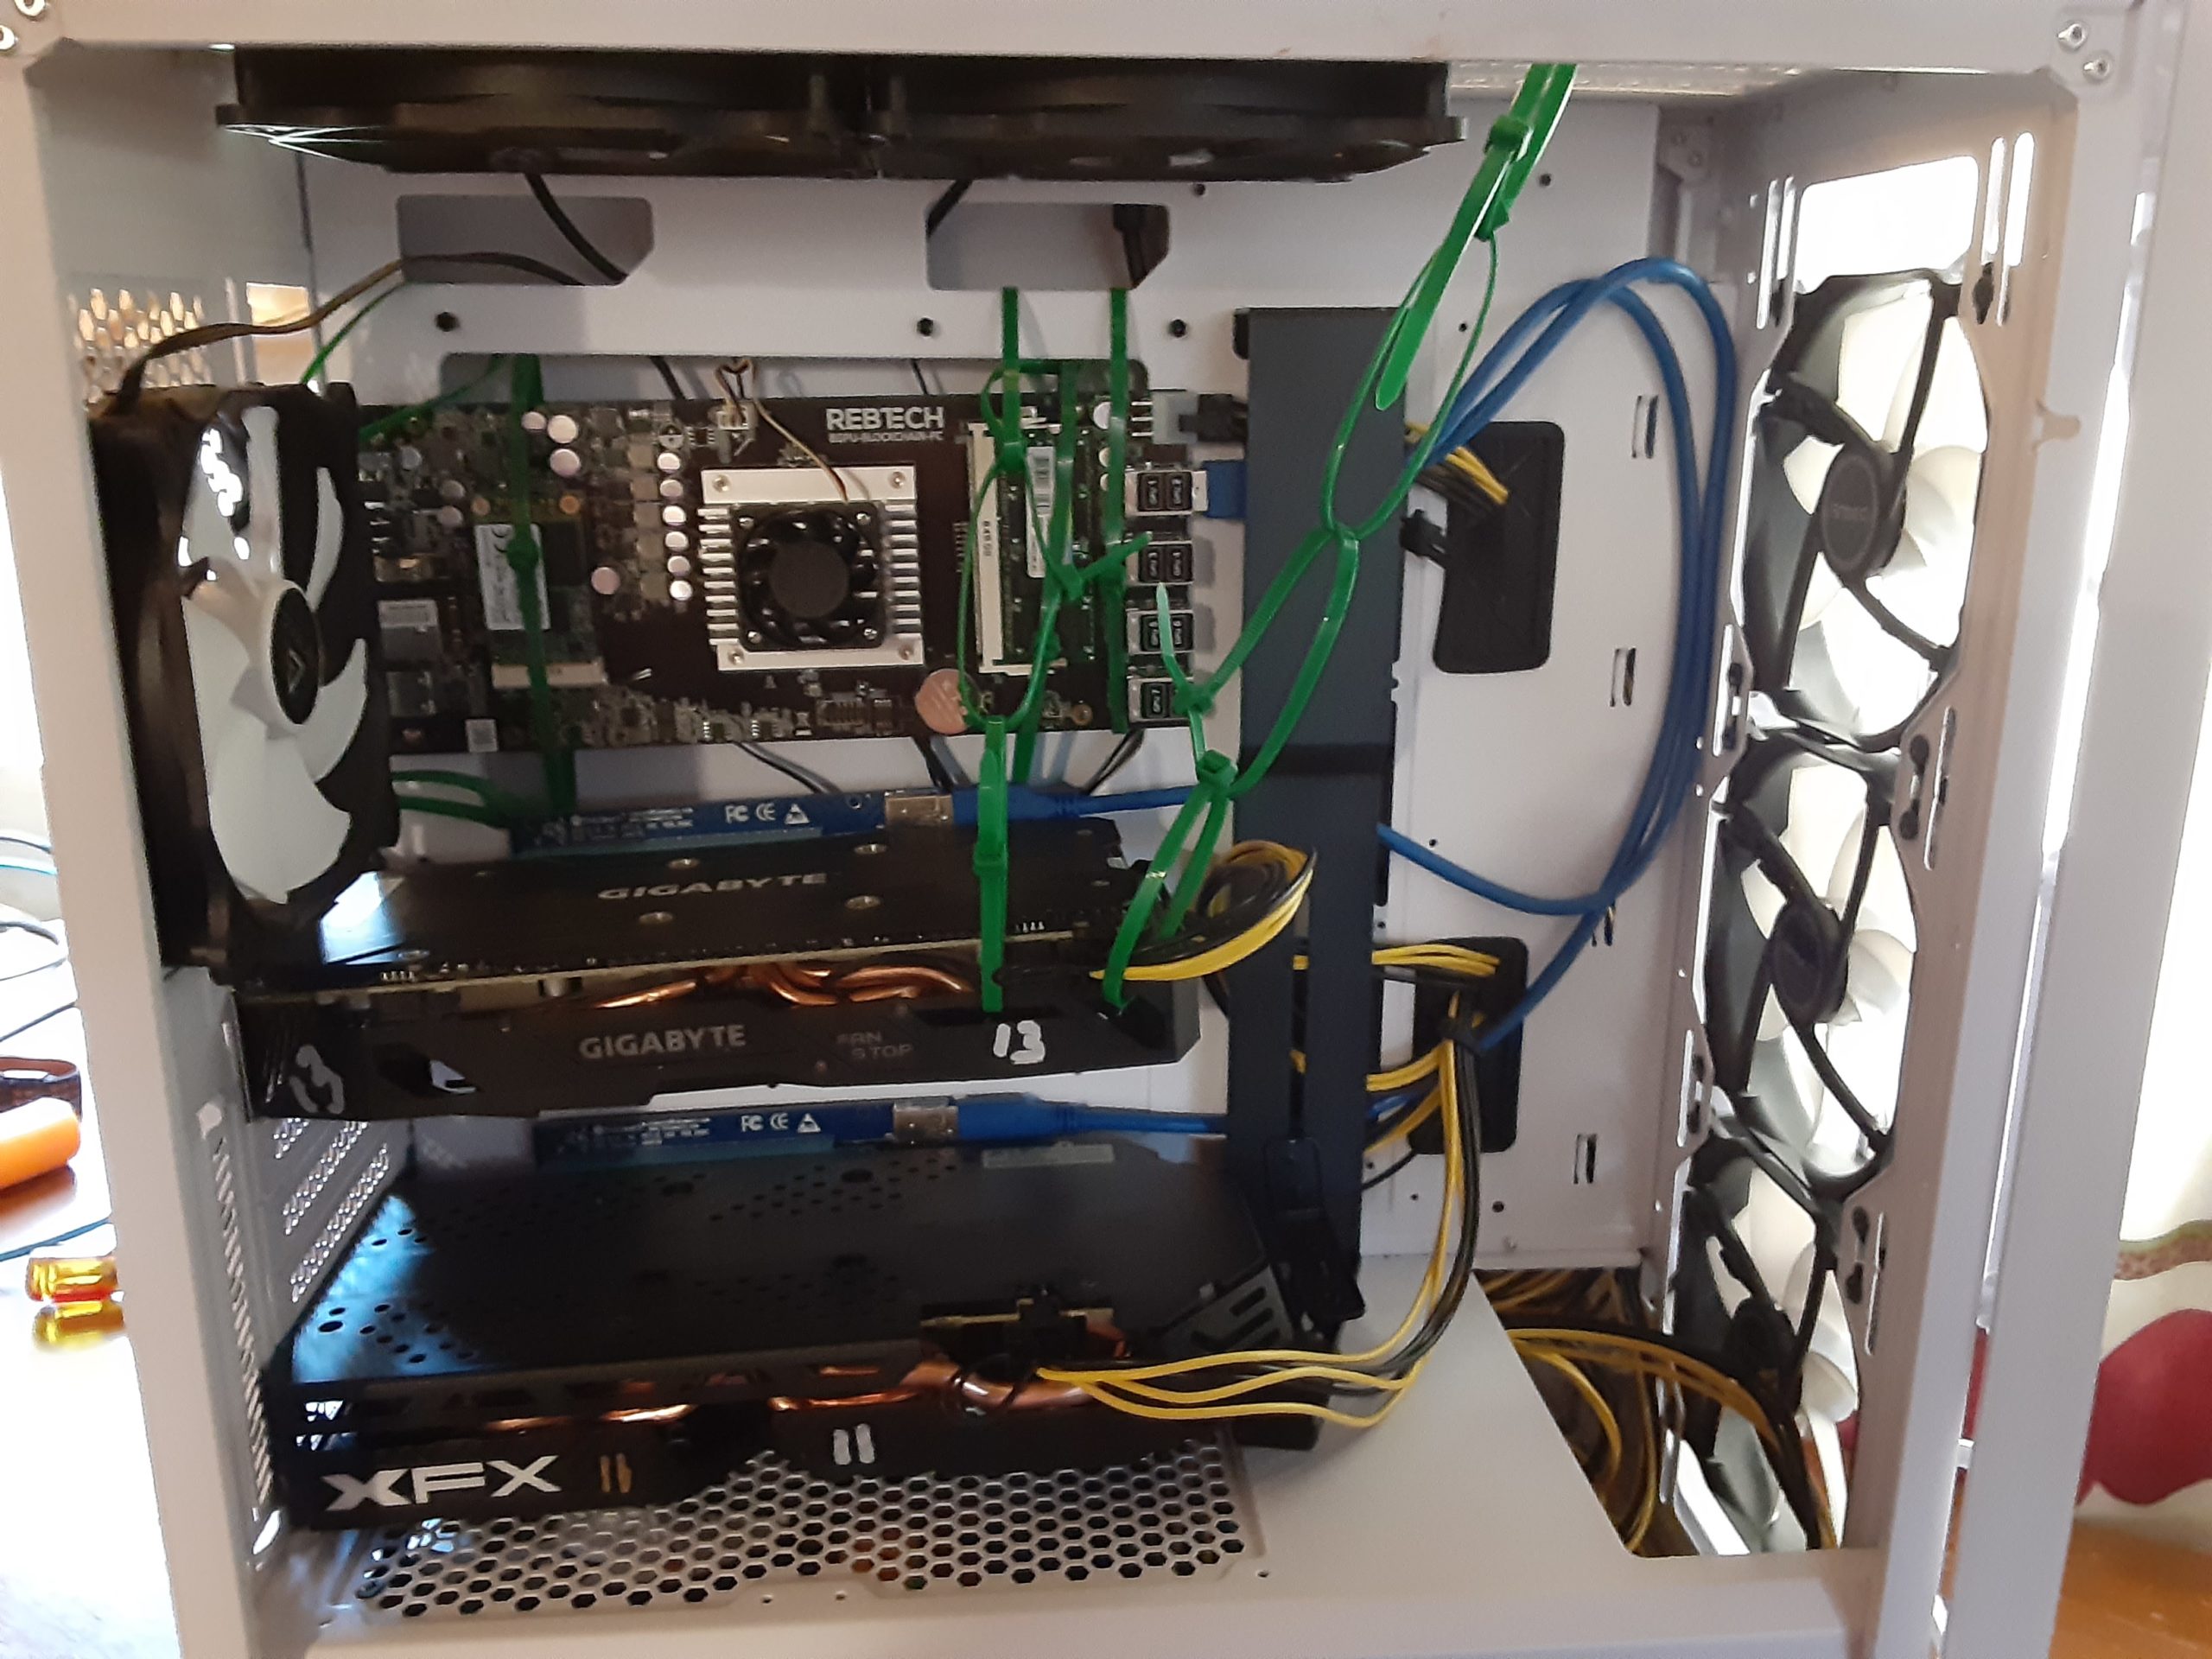
3. With the packing material removed, the inside of the case should look like this.
4. Make sure none of the wires and cables are touching any of the fans, and that the three major components are still separated like above.
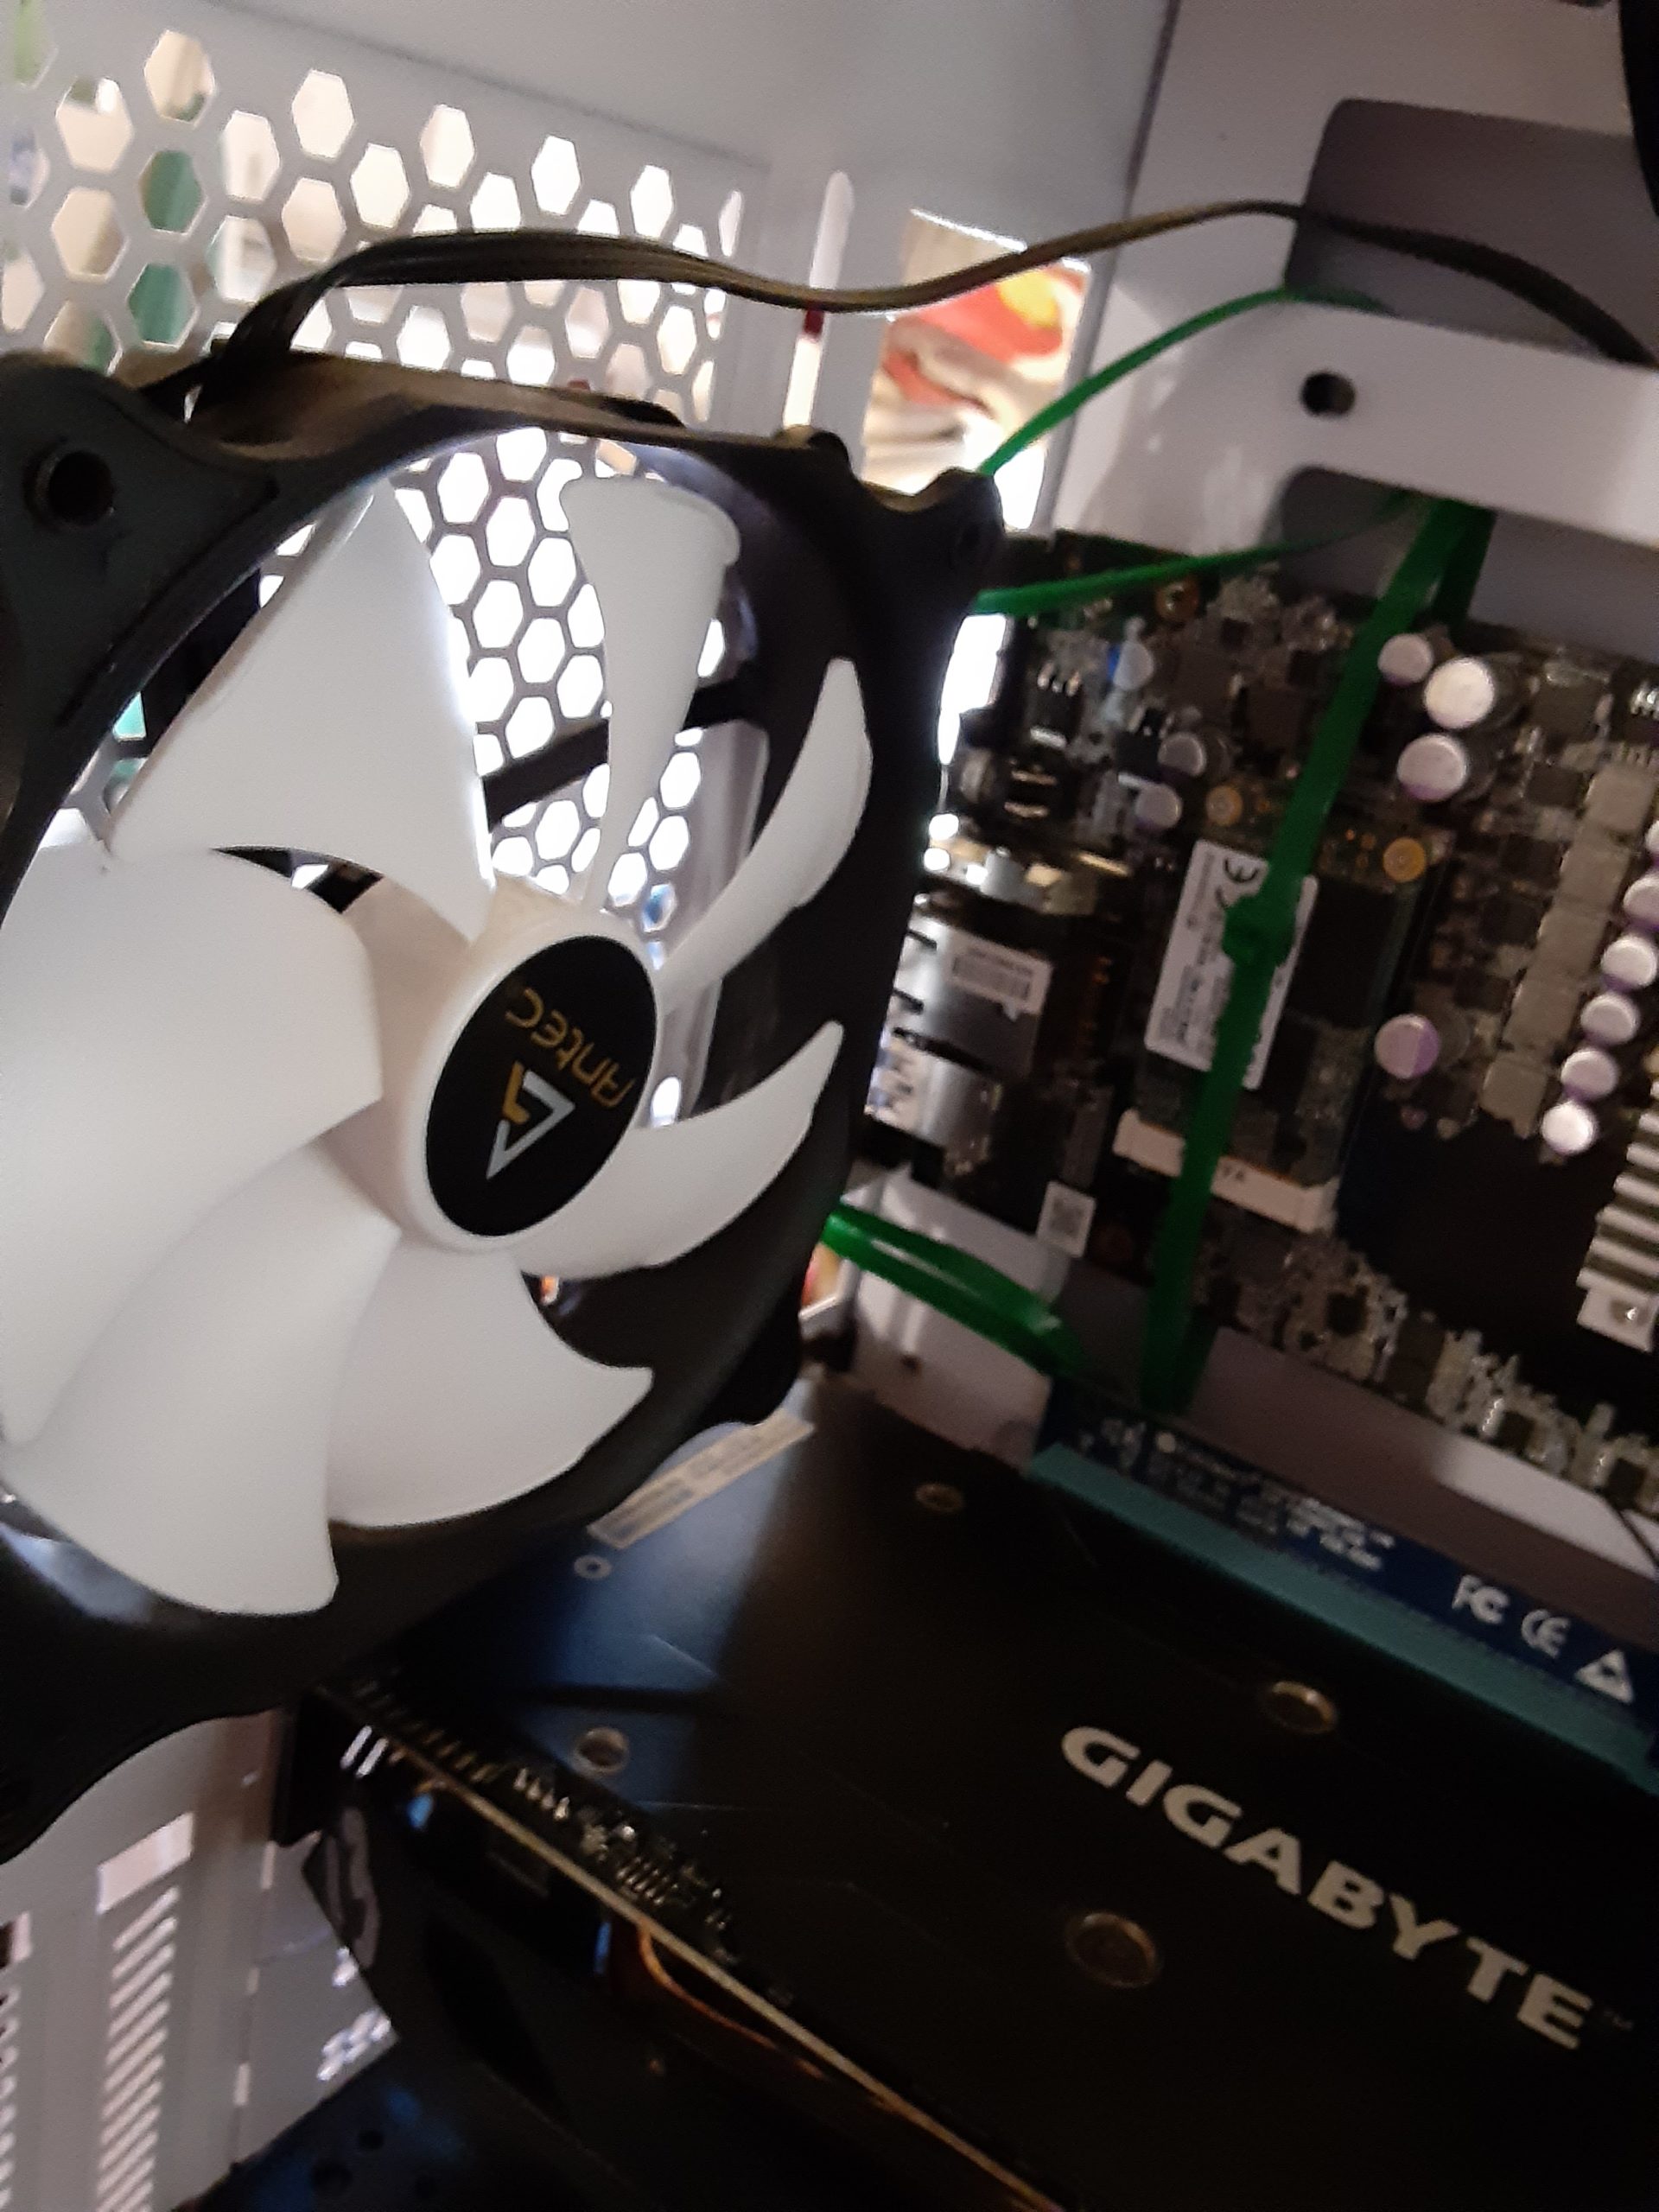
5. Some closeups of the inside of the case follow:

6. The blue cables should be tucked into the corner of the case, well away from the fans.
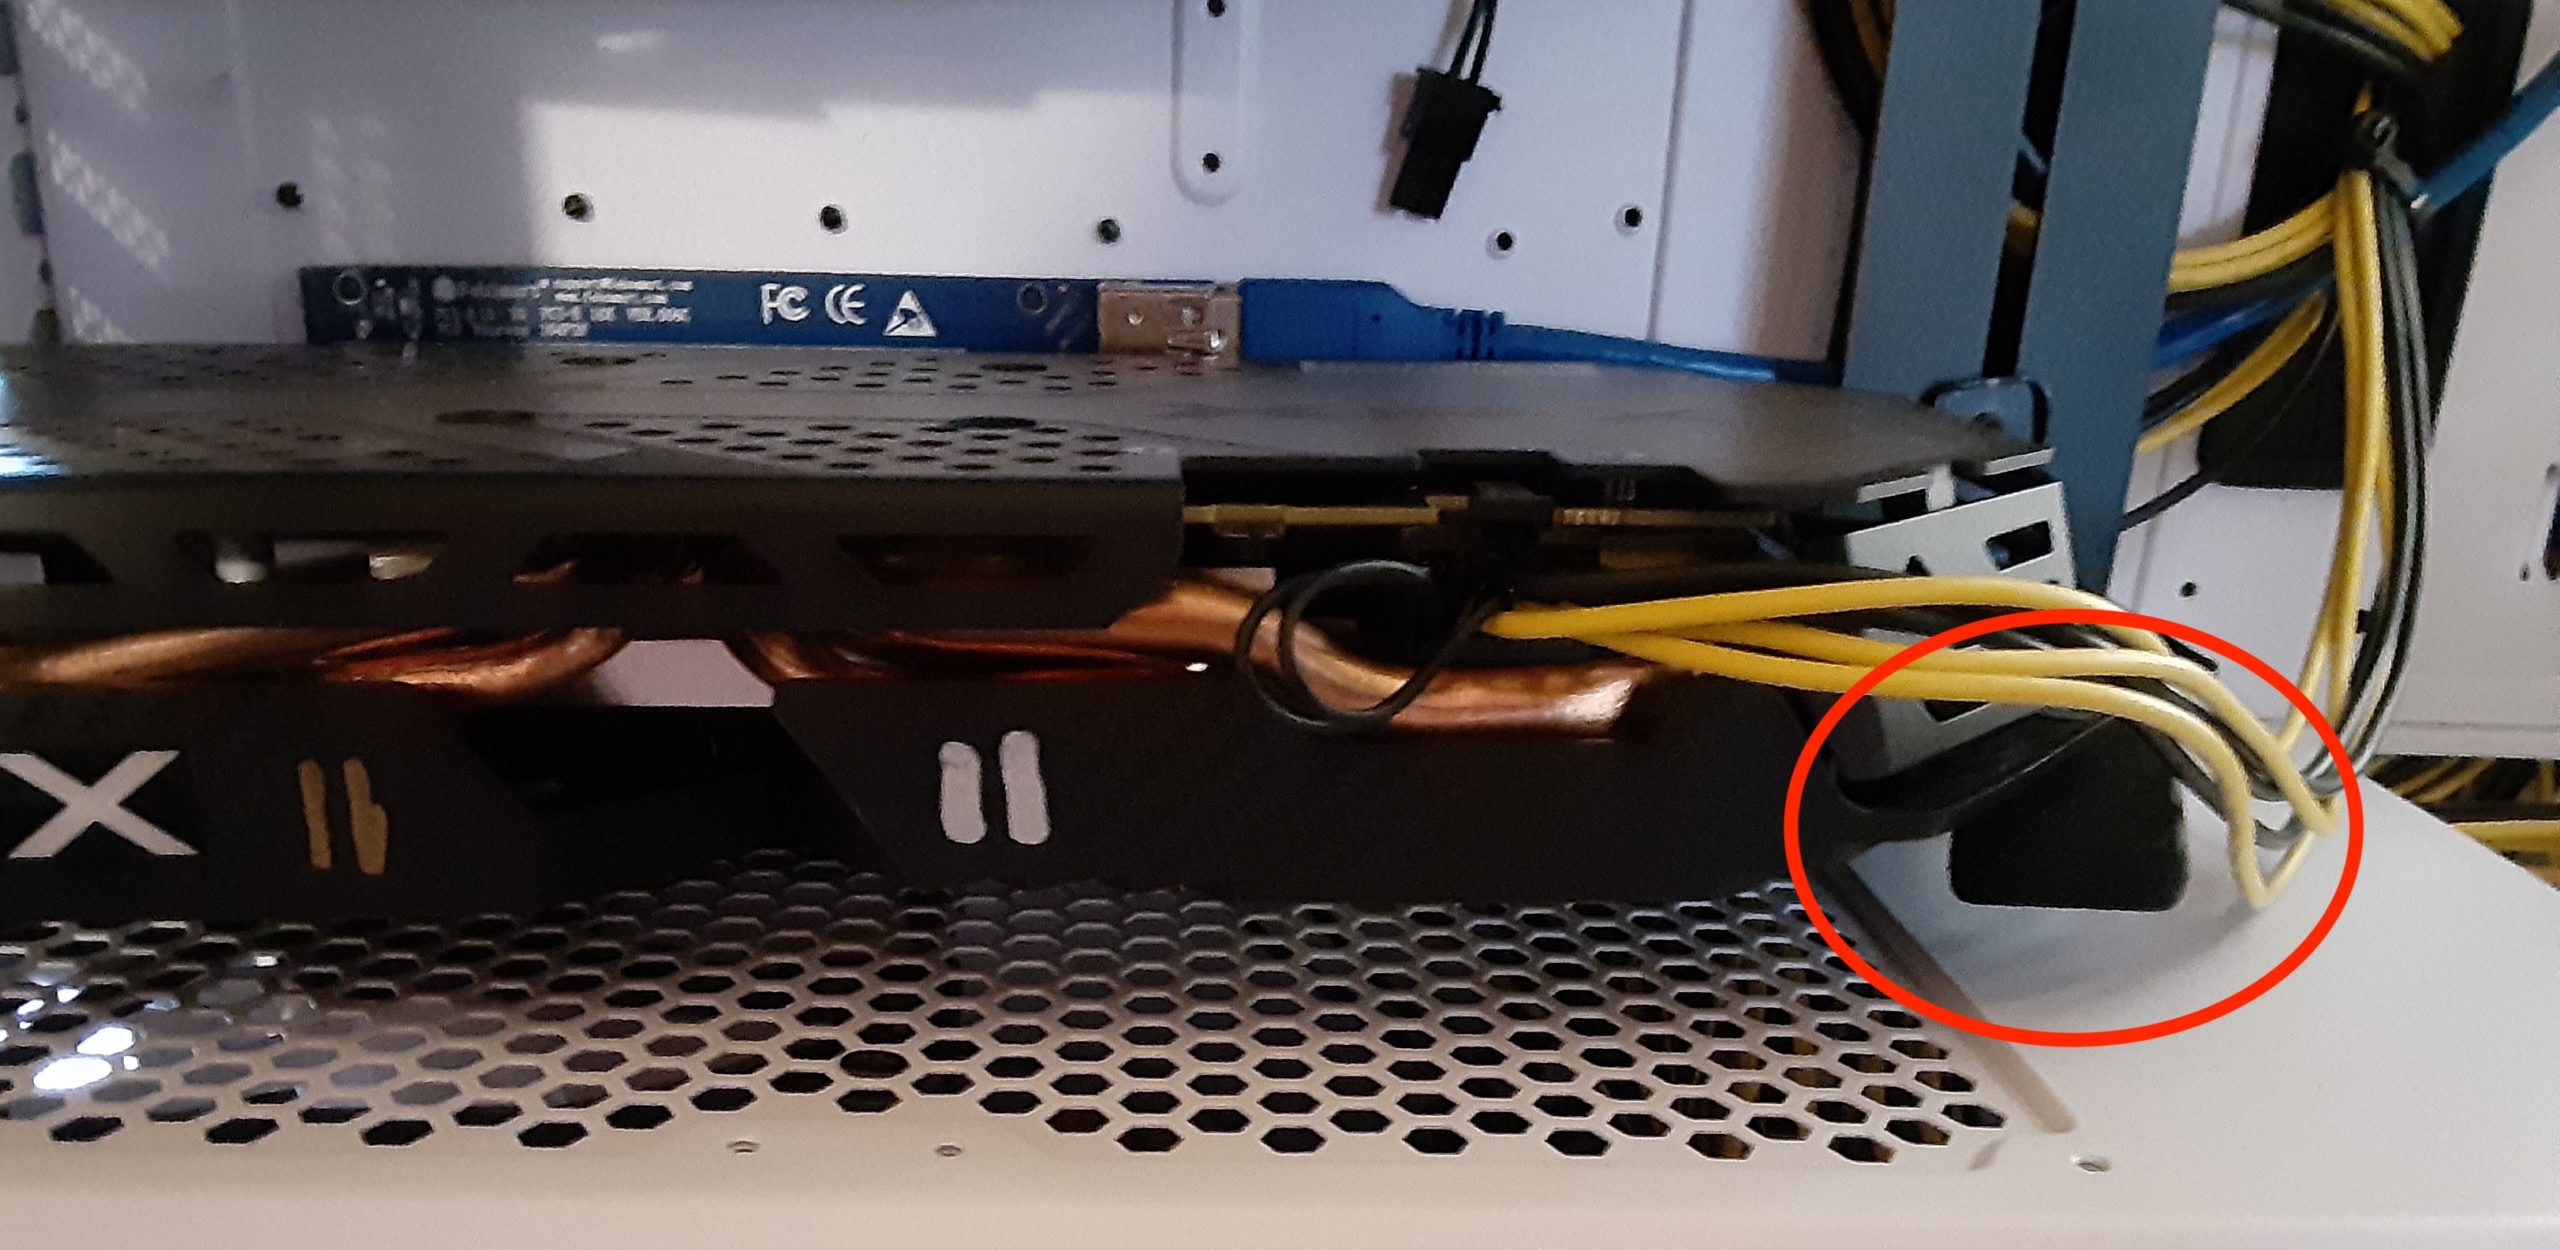
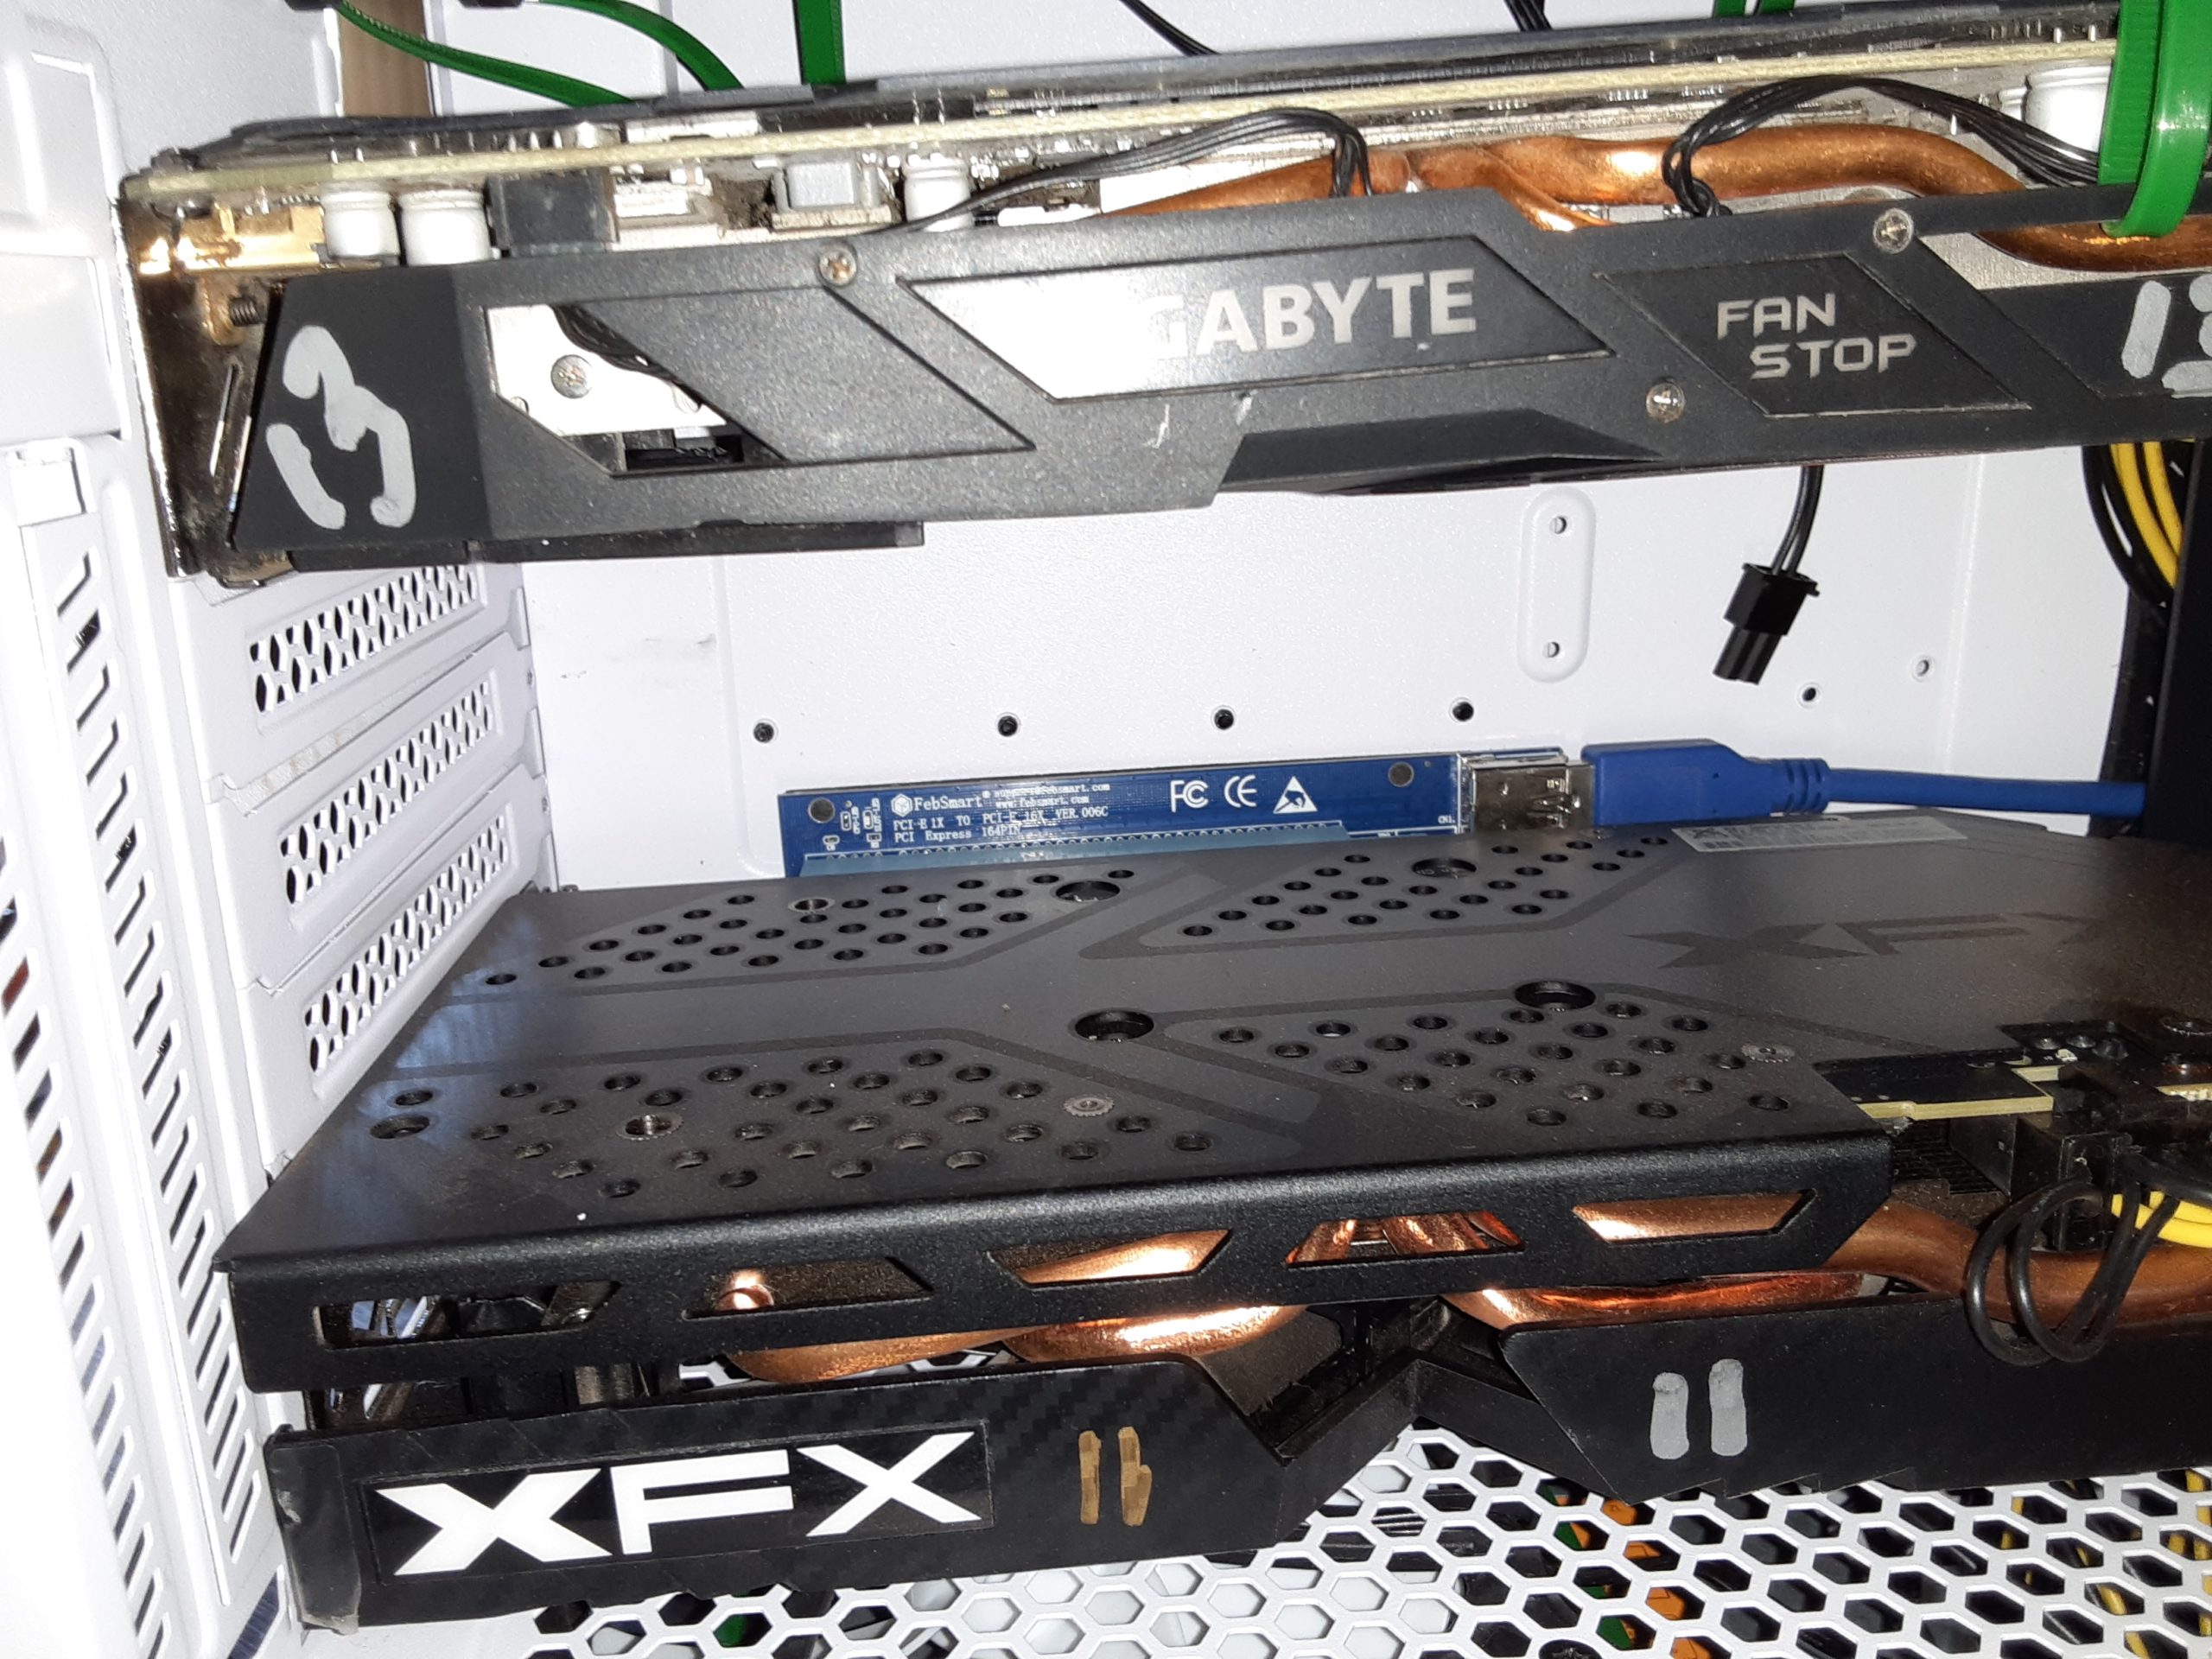
7. Note how the metal tab that keeps the bottom card away from the case just catches the corner of the card. Too far in and it’ll rub the fan on the card, chipping the blades. Too far out and the card will slump, touch the case and the card’s fan blades will rub.
FYI: The cards are Graphic Processing Units (GPUs), or graphics cards. They are the heart of the unit and do all of the crypto mining.
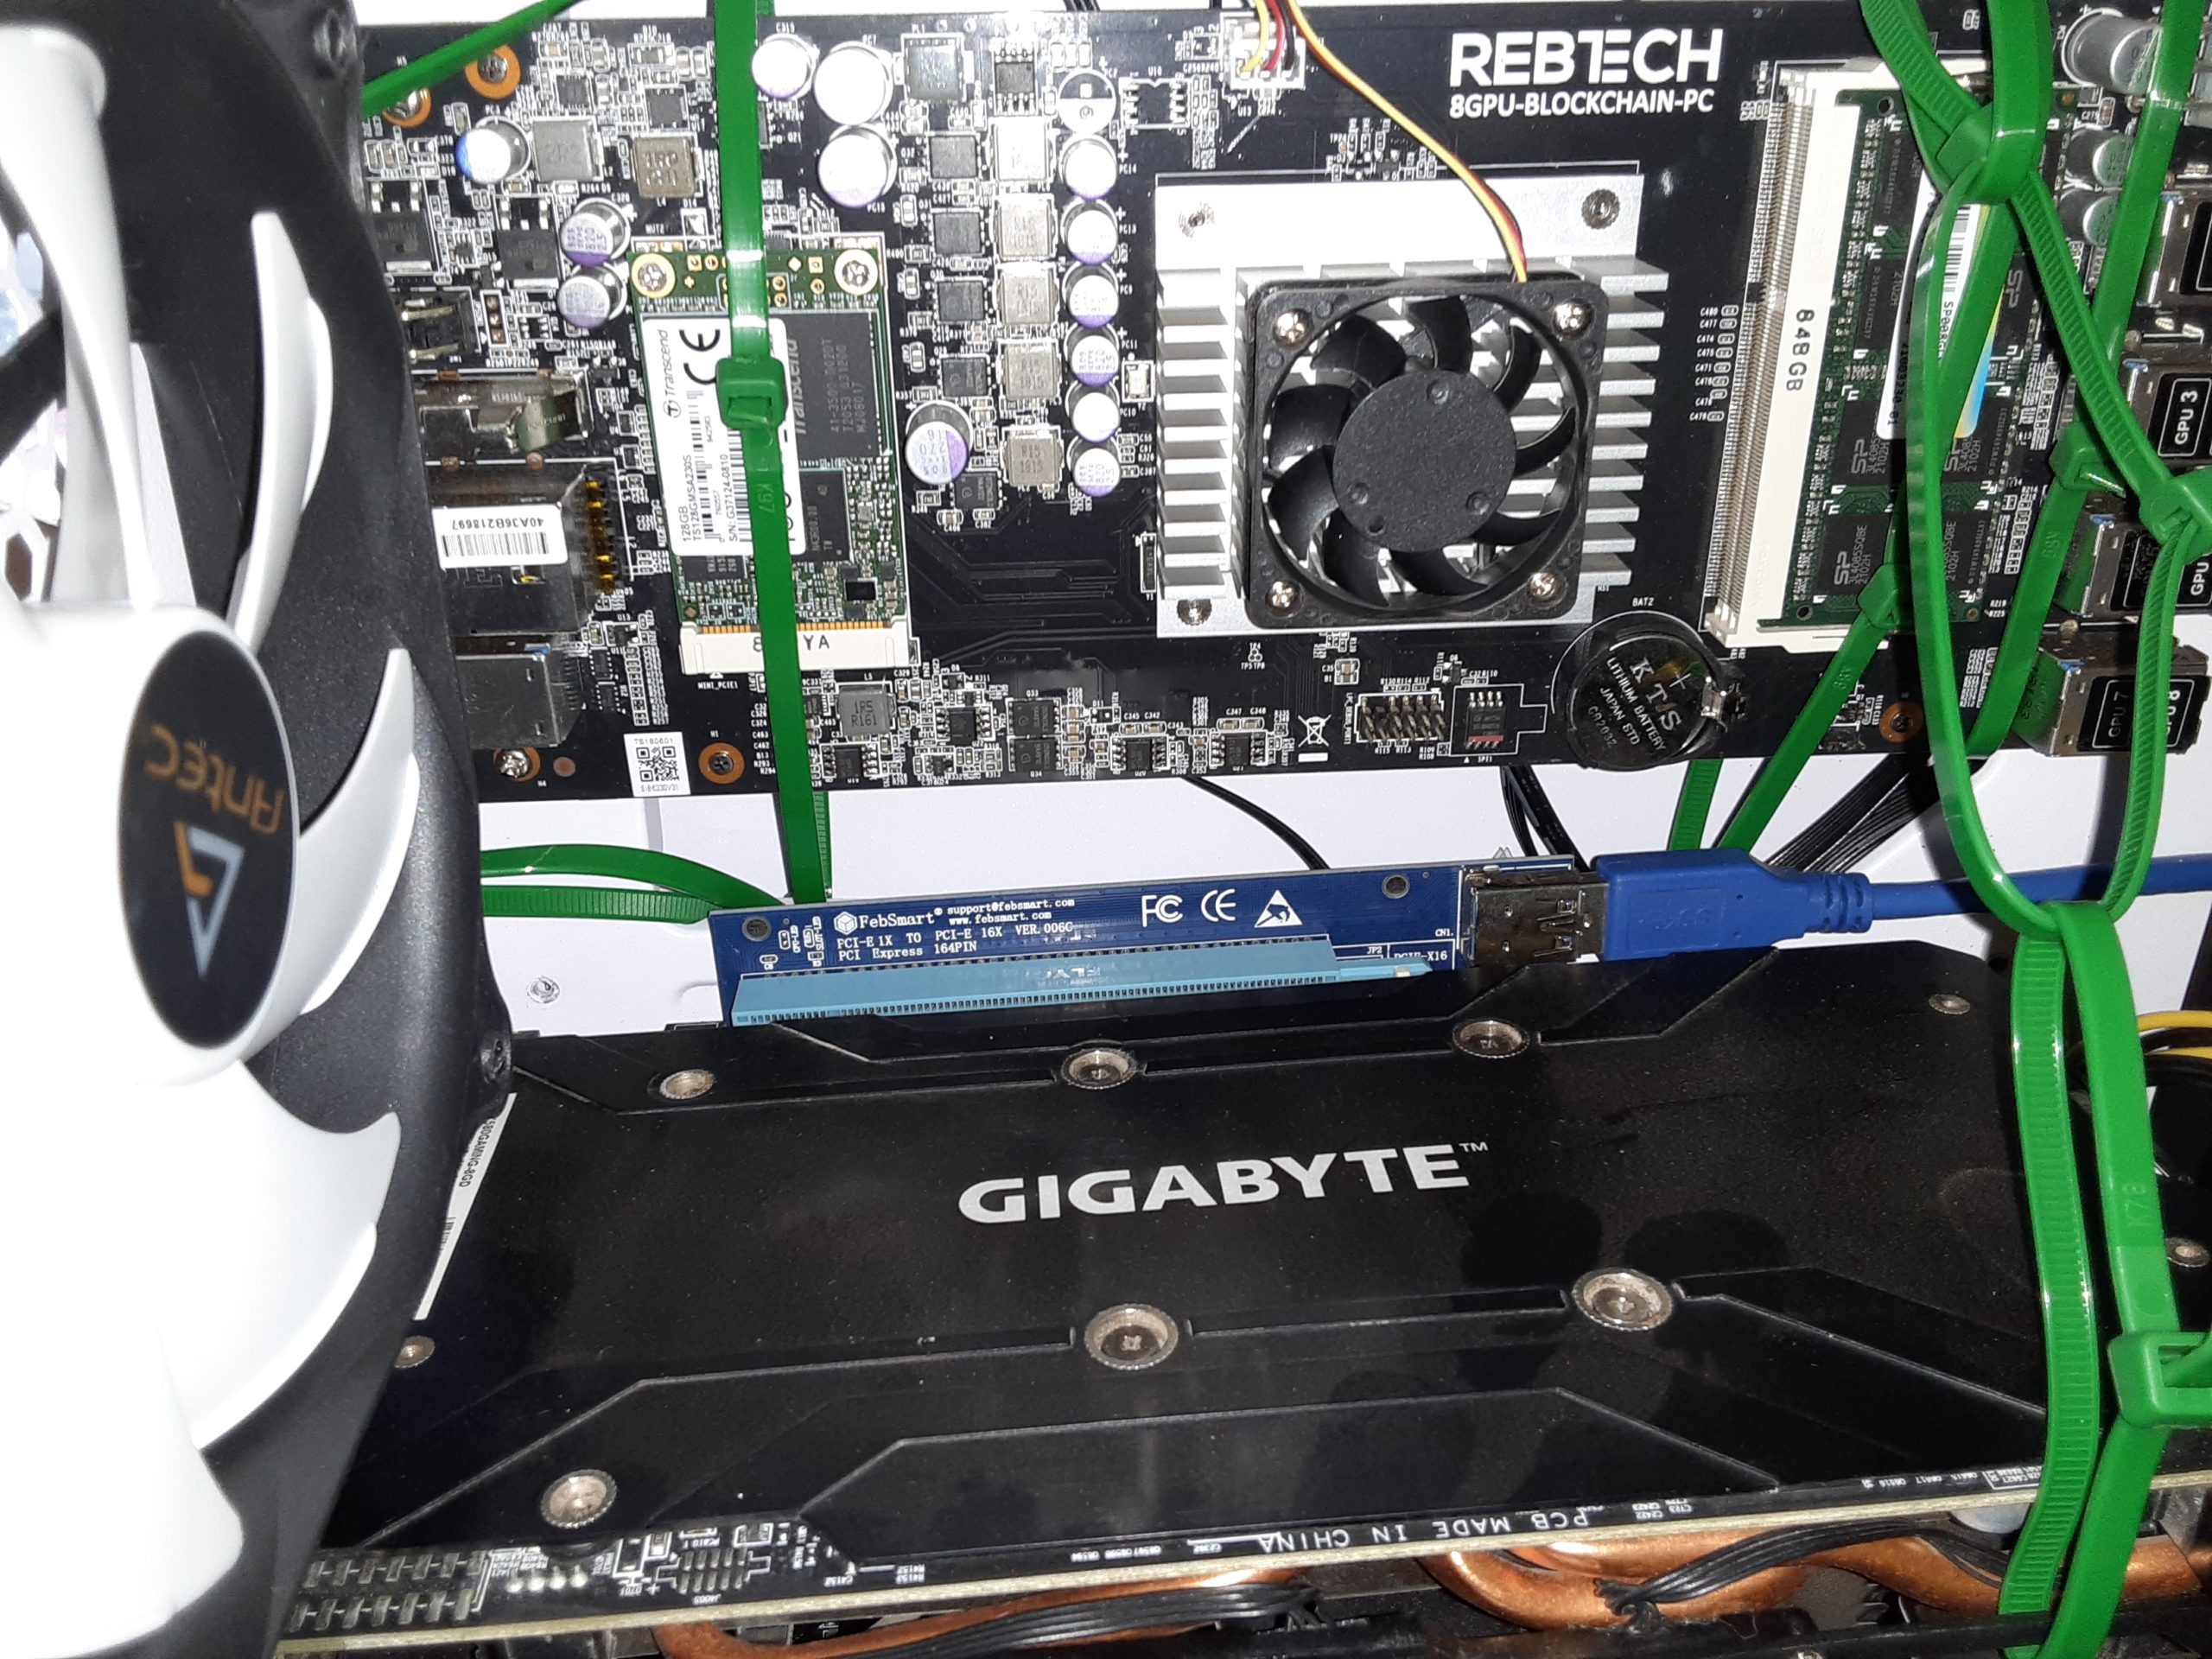
8. Note how the power cables are not touching the cards.
9. This is the upper graphics card. Note how the cables don’t touch the card.
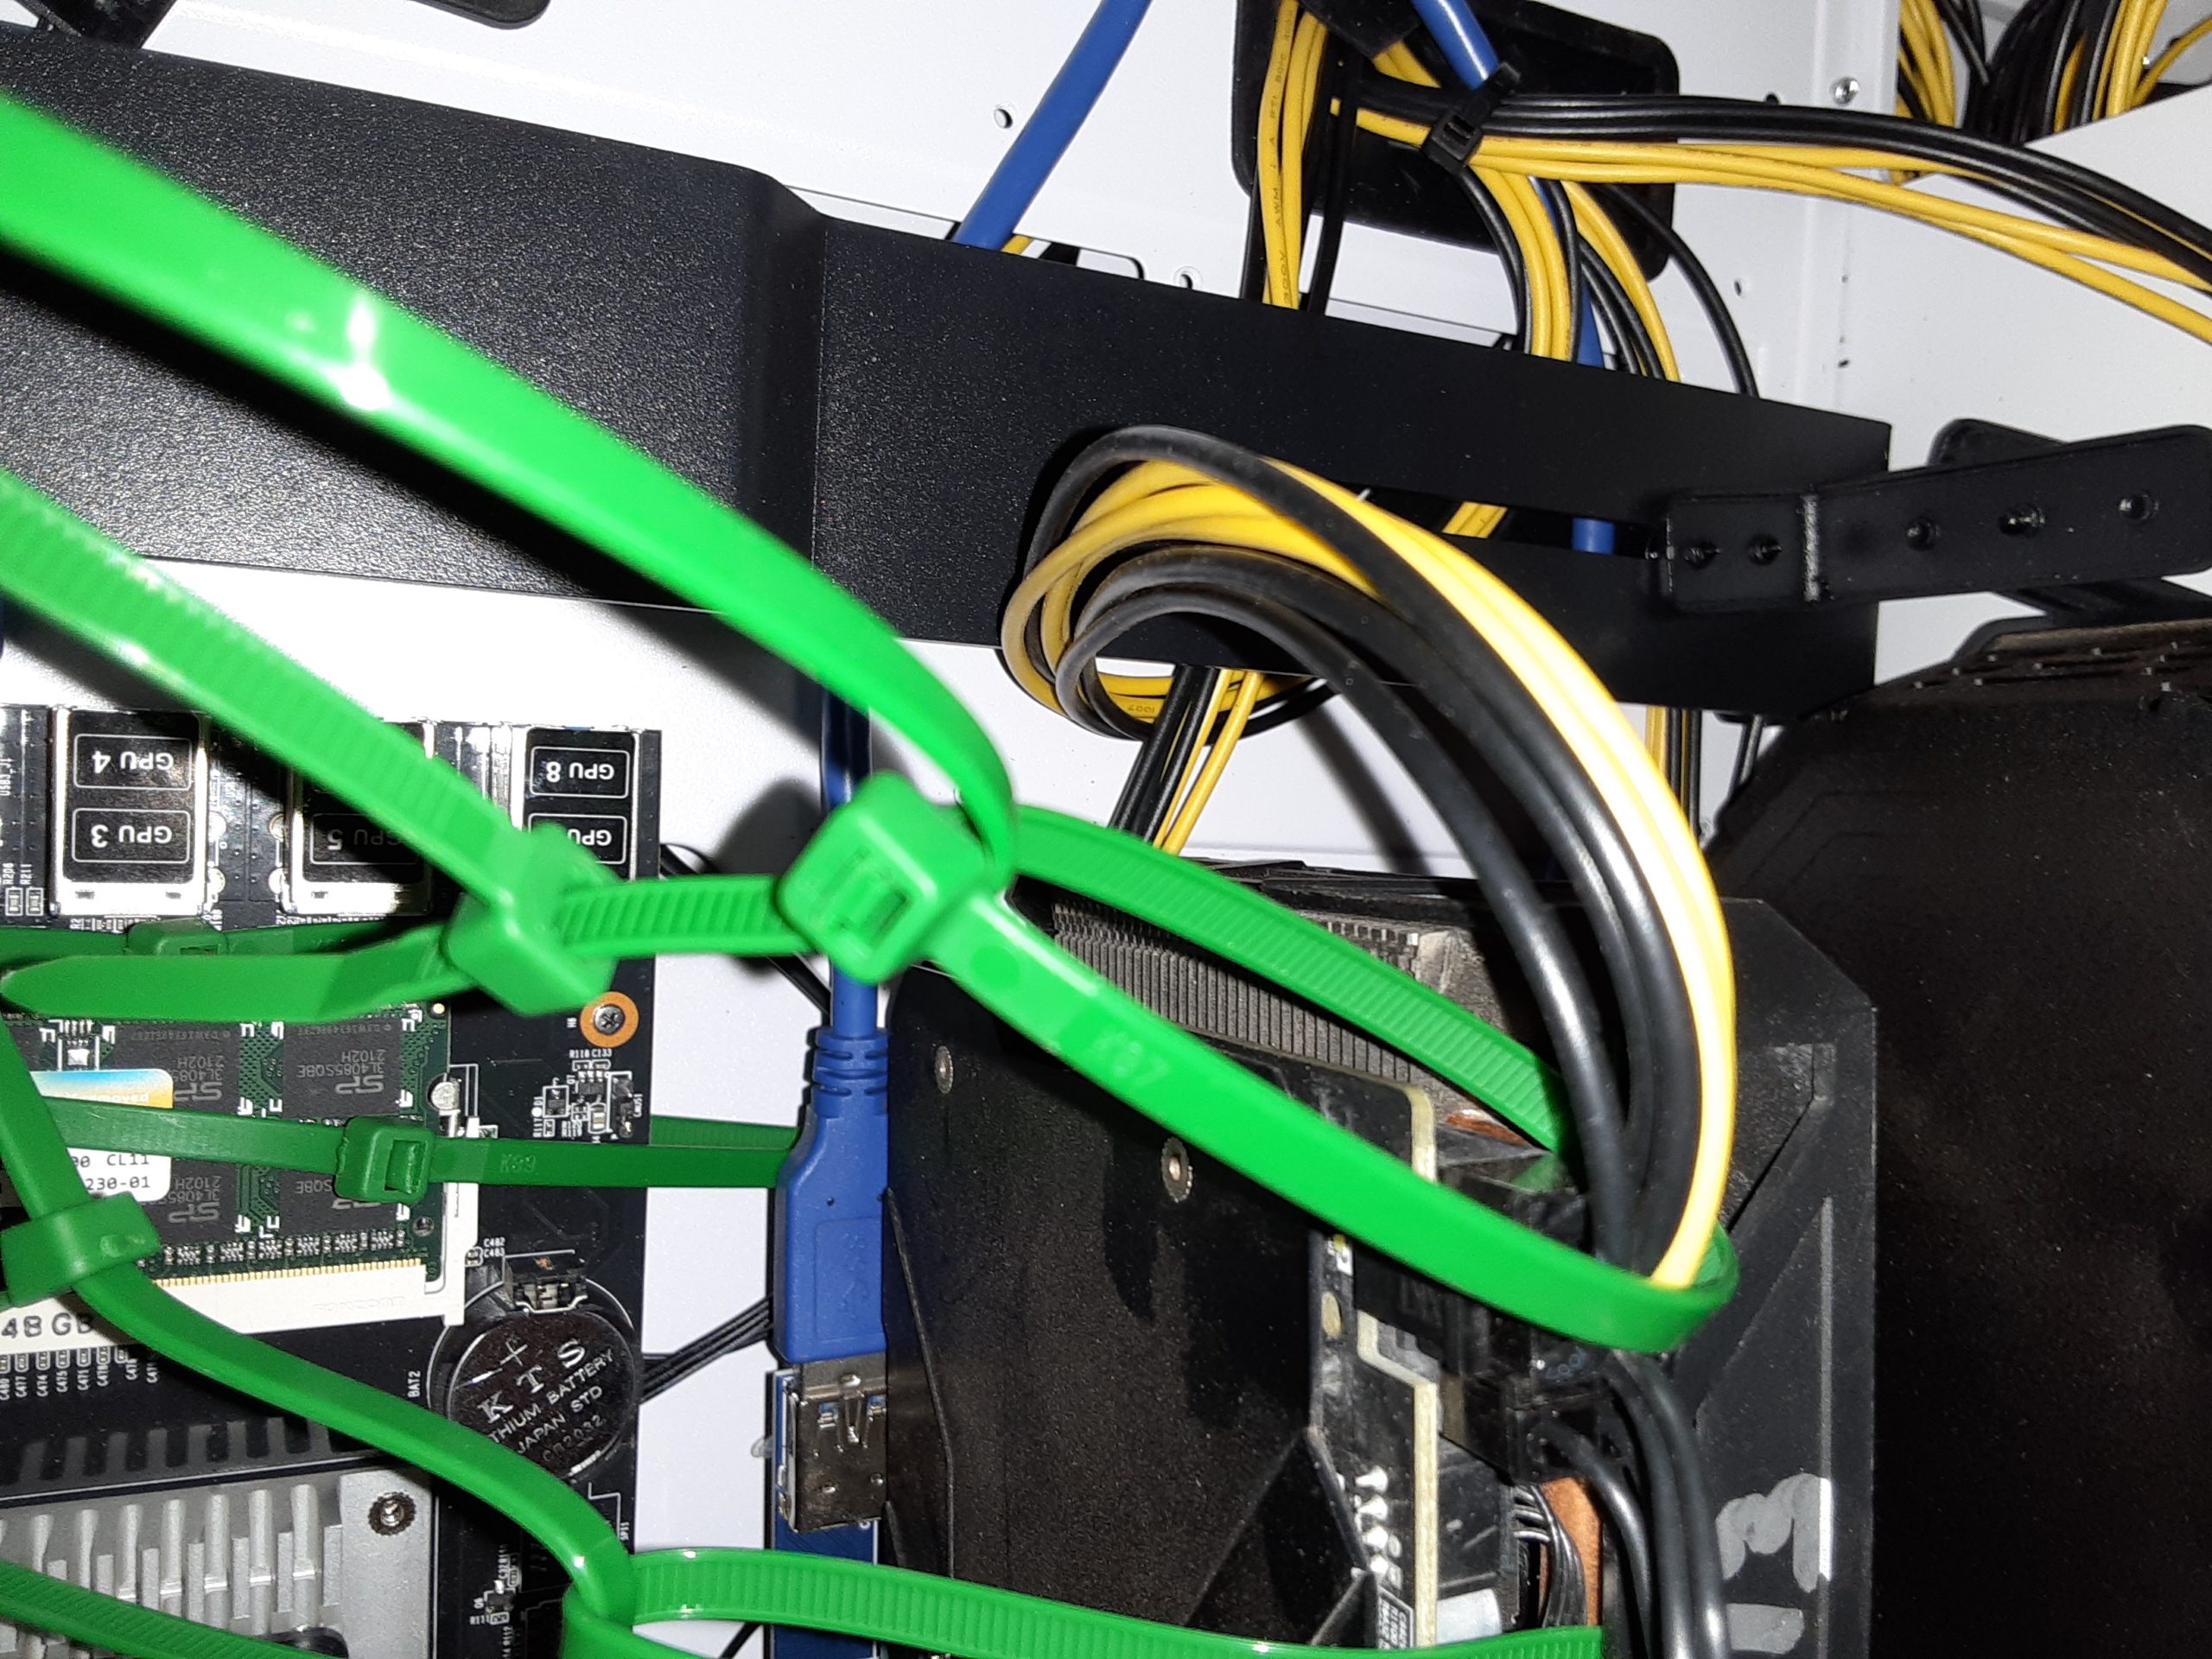
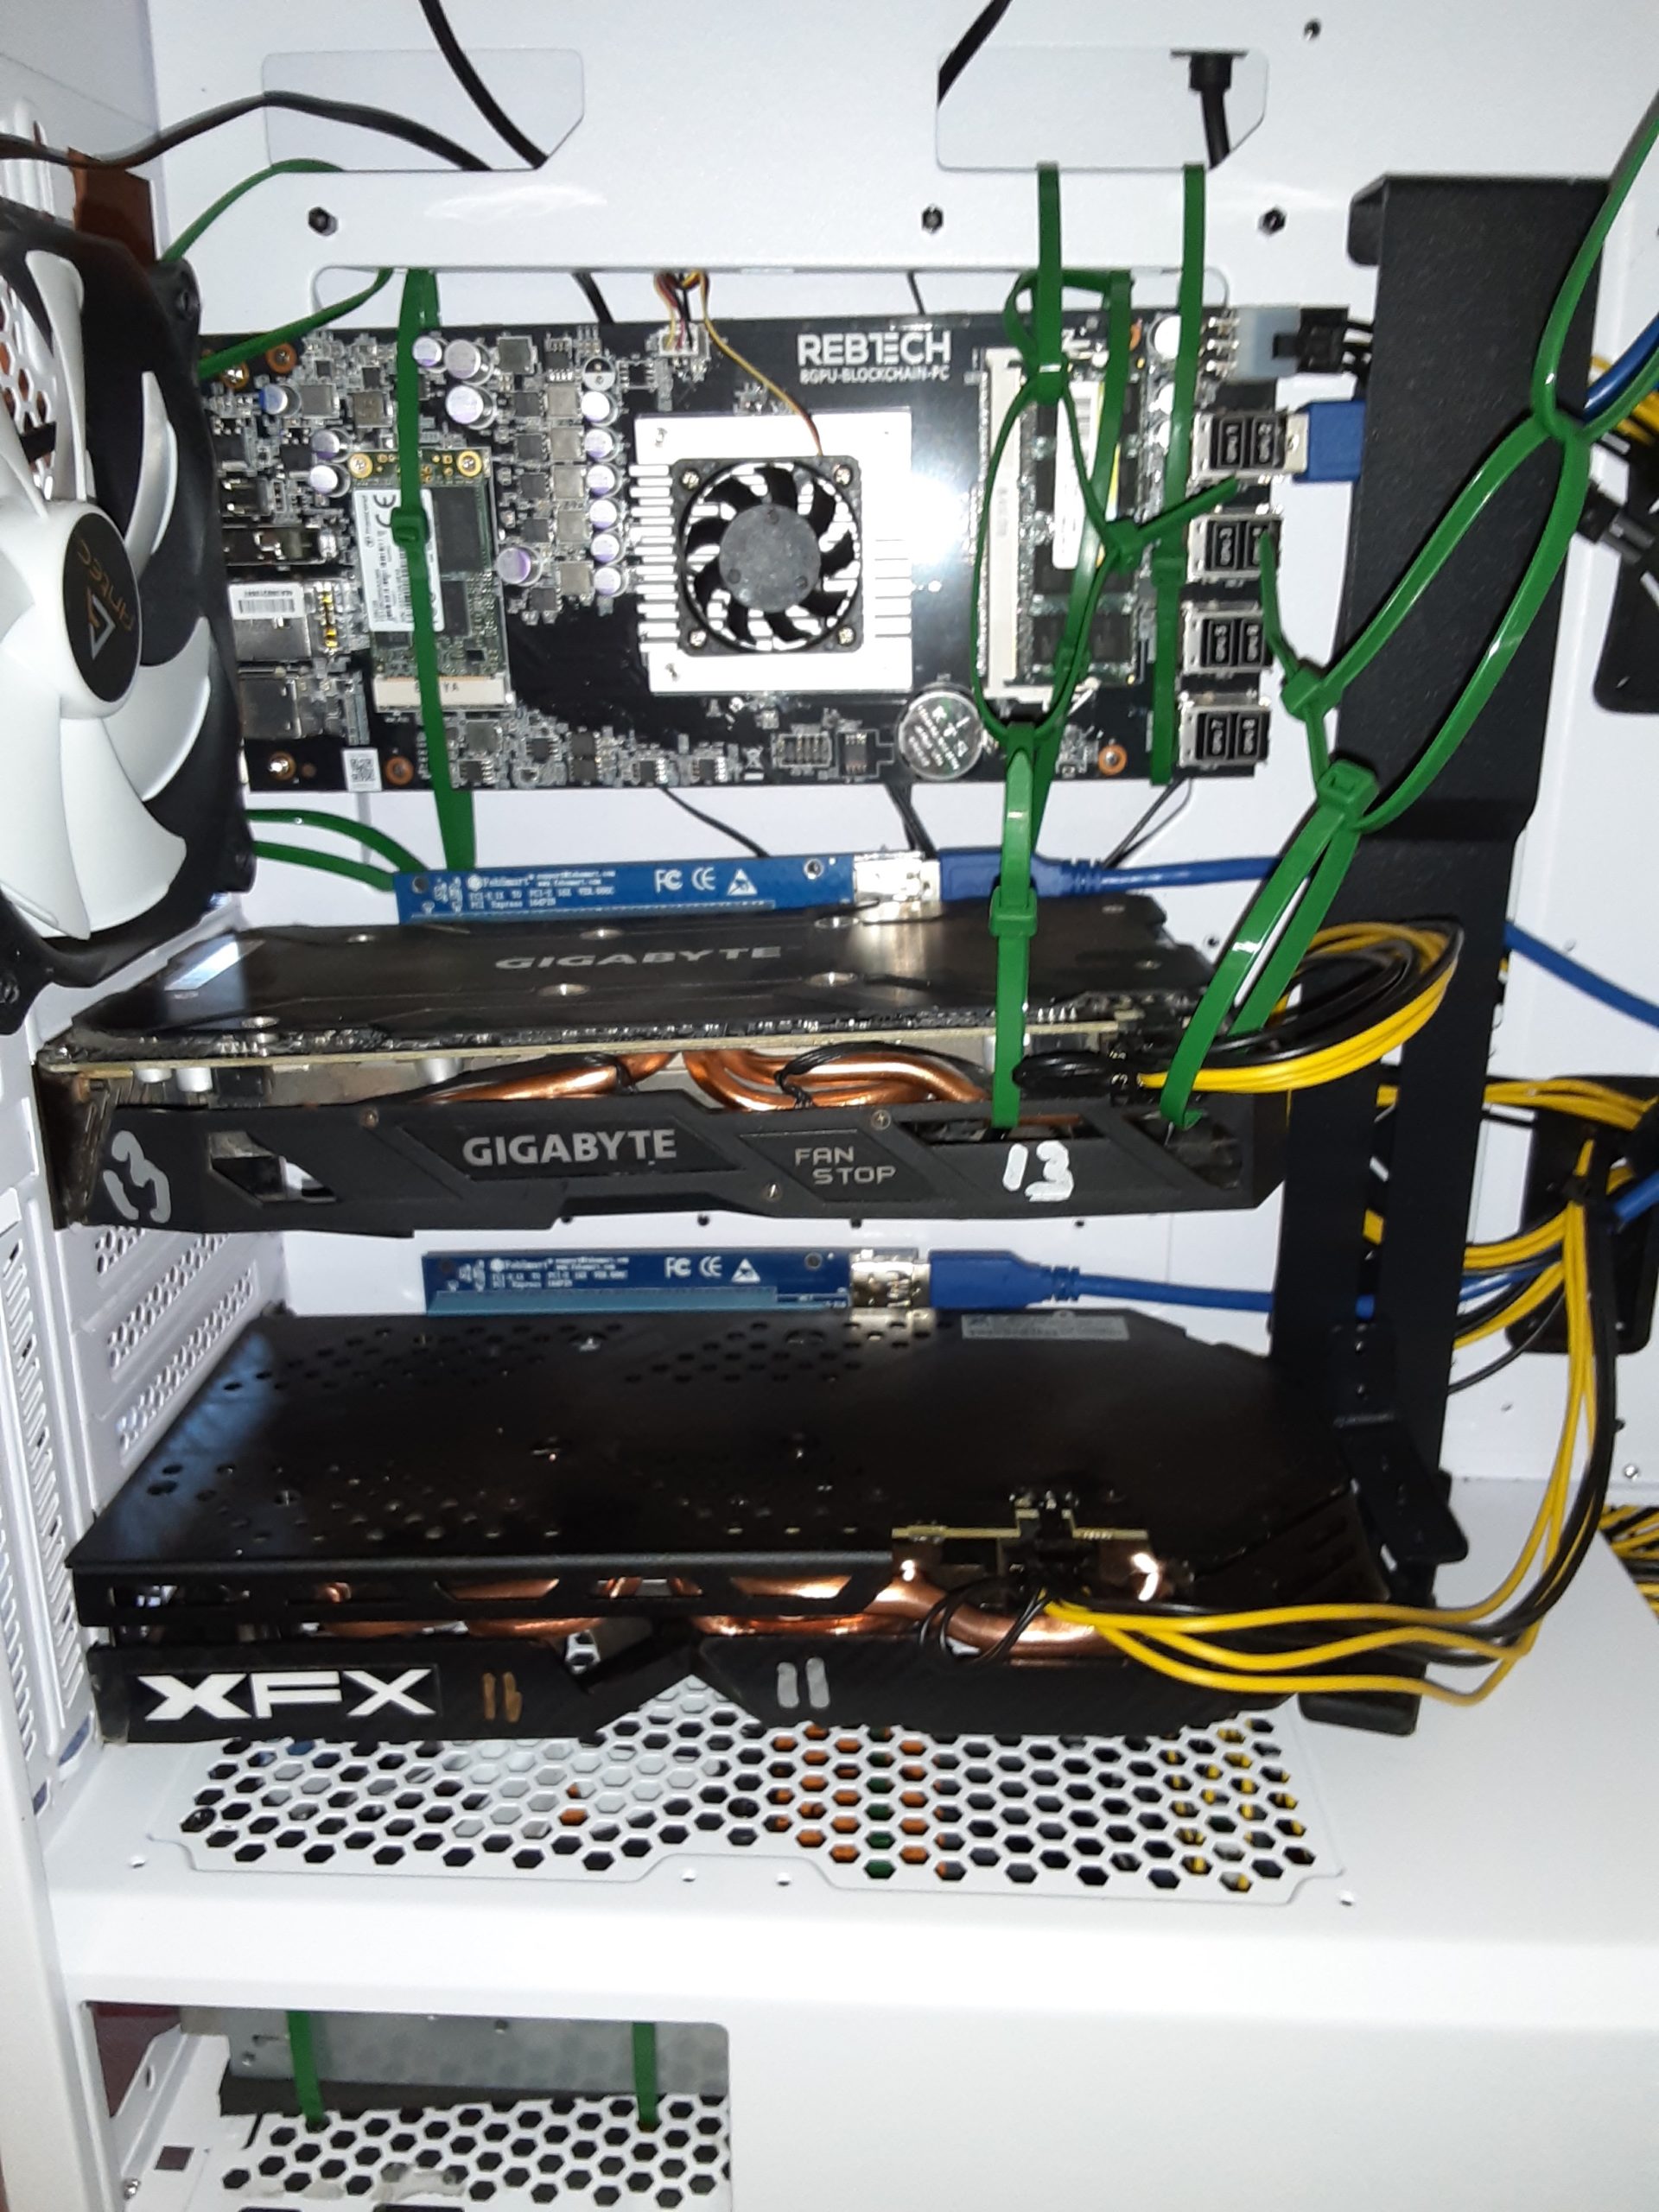
10. The two sets of zip ties keep the upper card centered in position. While the machine has been run for almost 100 hours, if they soften some more and the card sags from its position, you may need to pull them a click or two tighter.
11. The zip ties should be checked monthly.
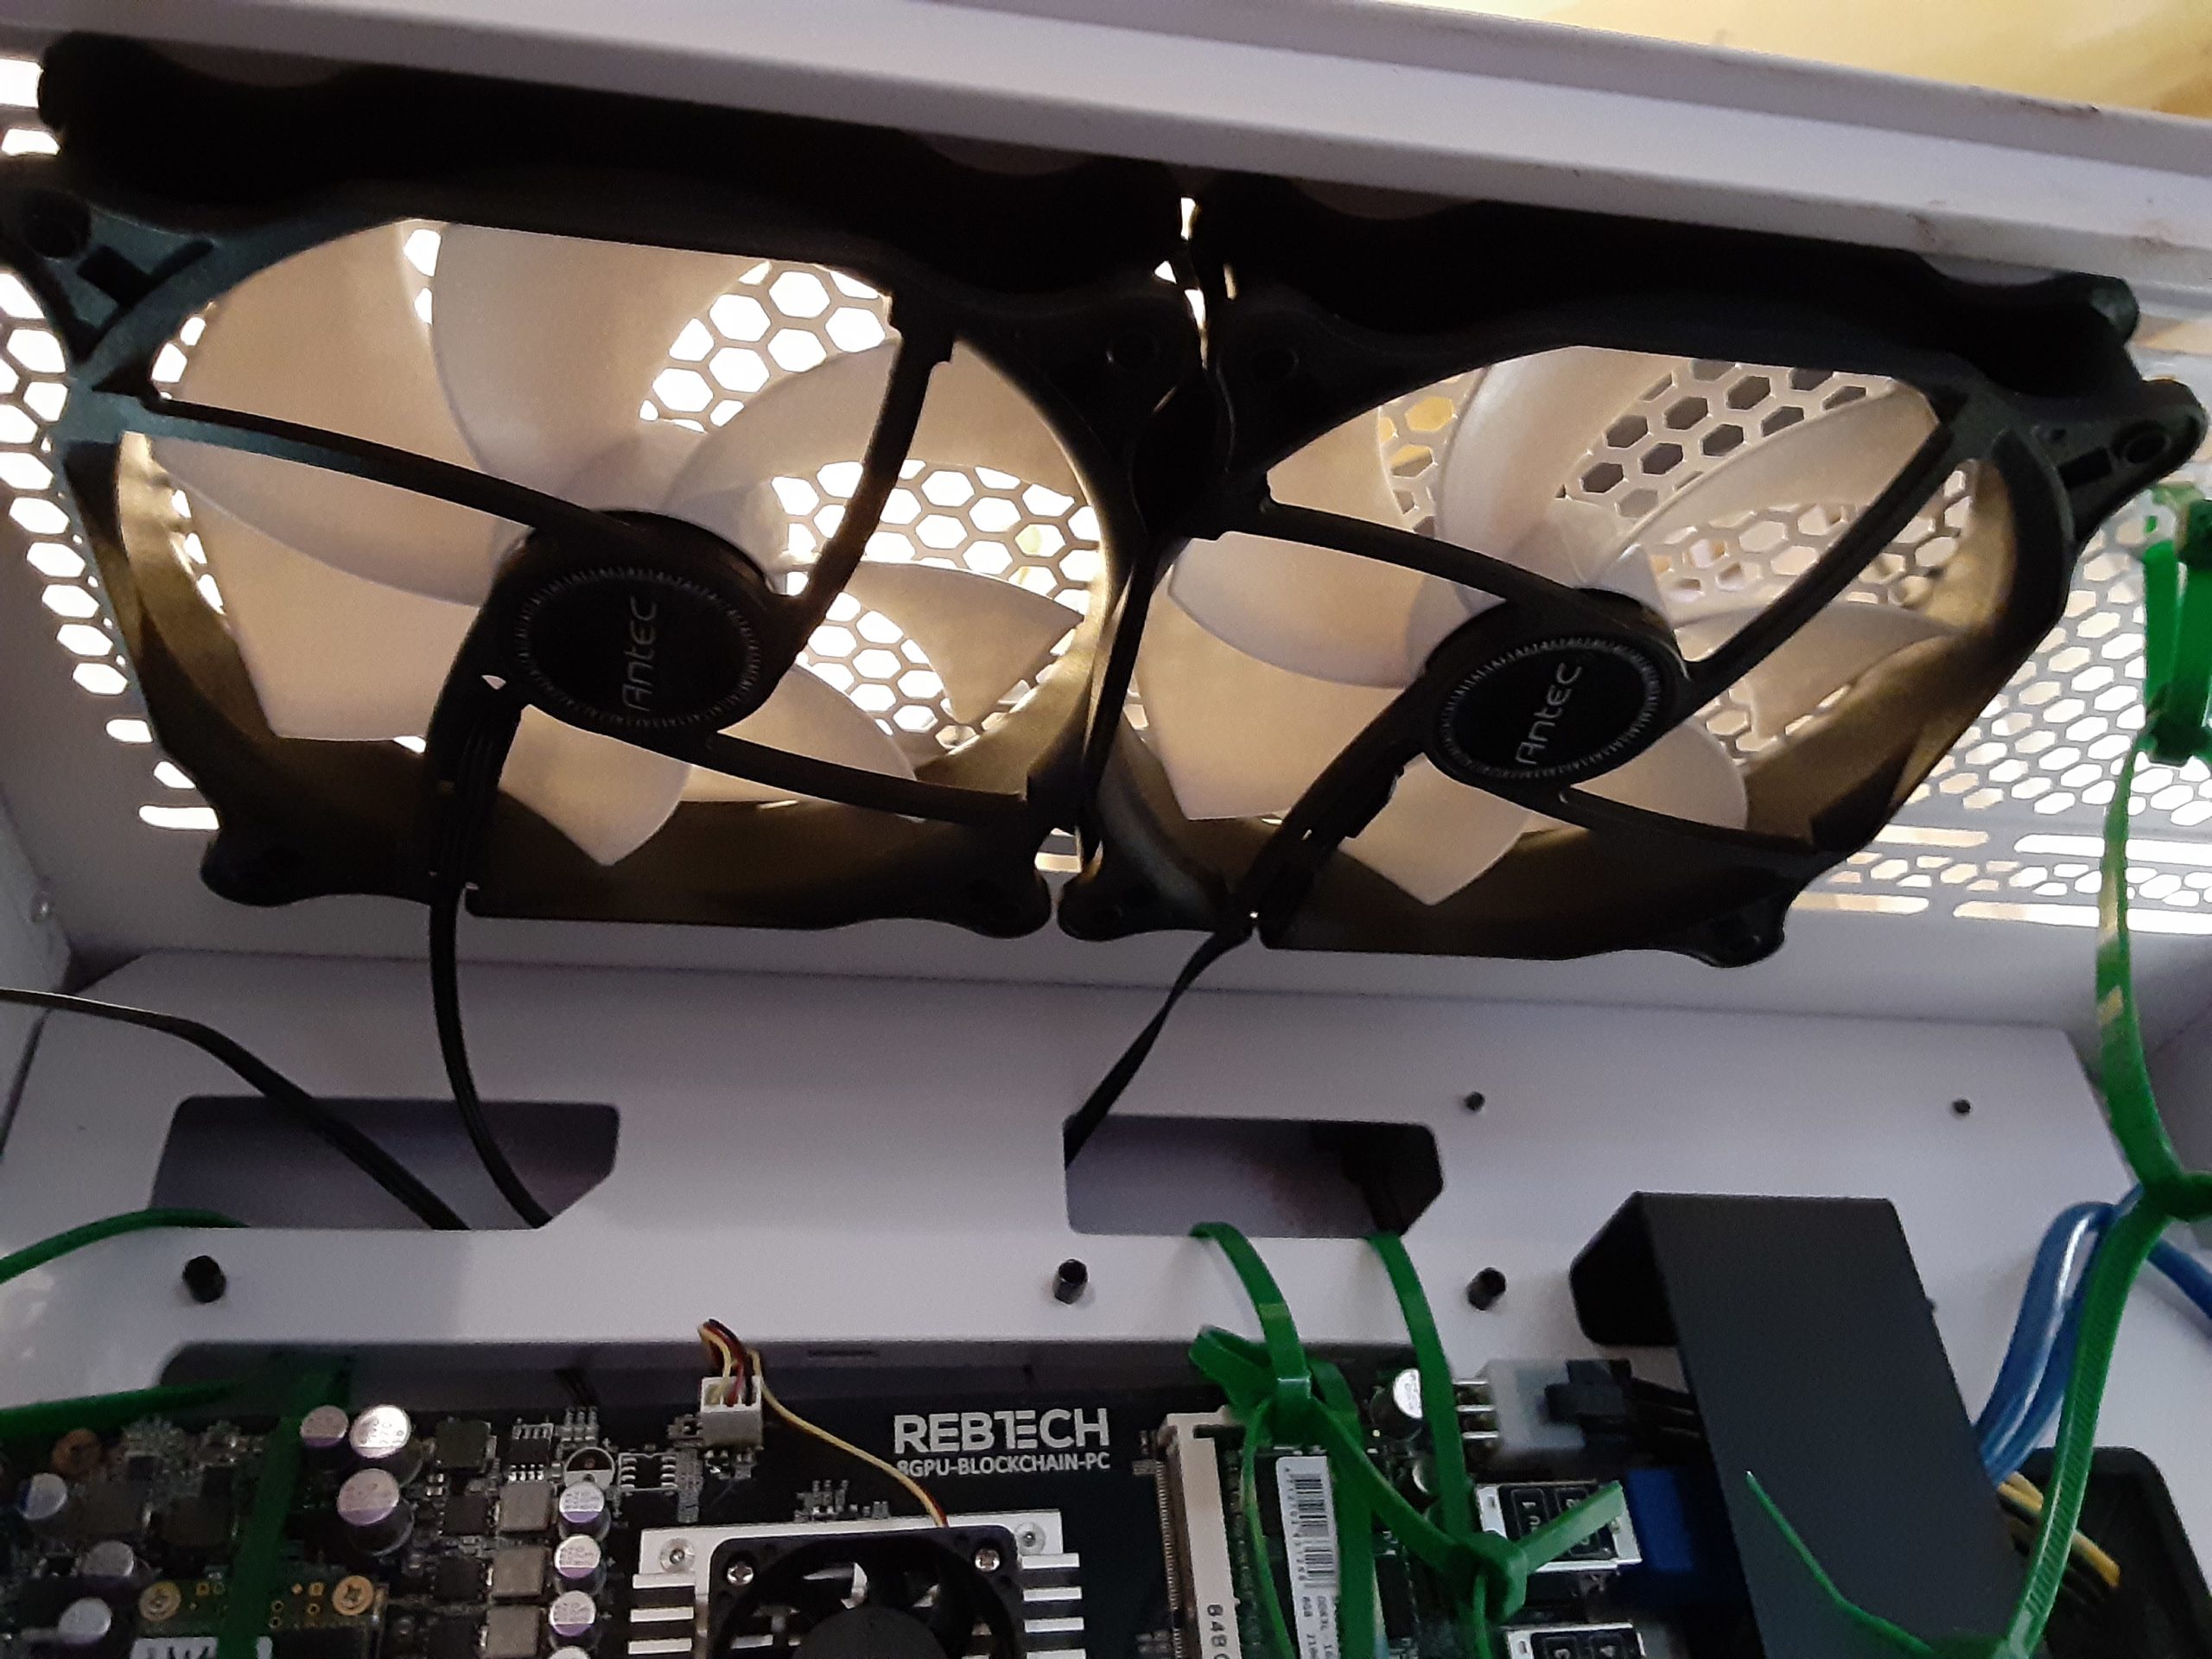
12. Looking up at the top of the case from the inside, the two fans on top should be clear of obstructions.
13. You can push any excess wire into the back side of the case.
14. A few more photos of the inside of the case before shipping, after making sure all the wires are out of the way:
15. When you’re satisfied that everything is clear inside the case, replace the glass panel and stand the case up.
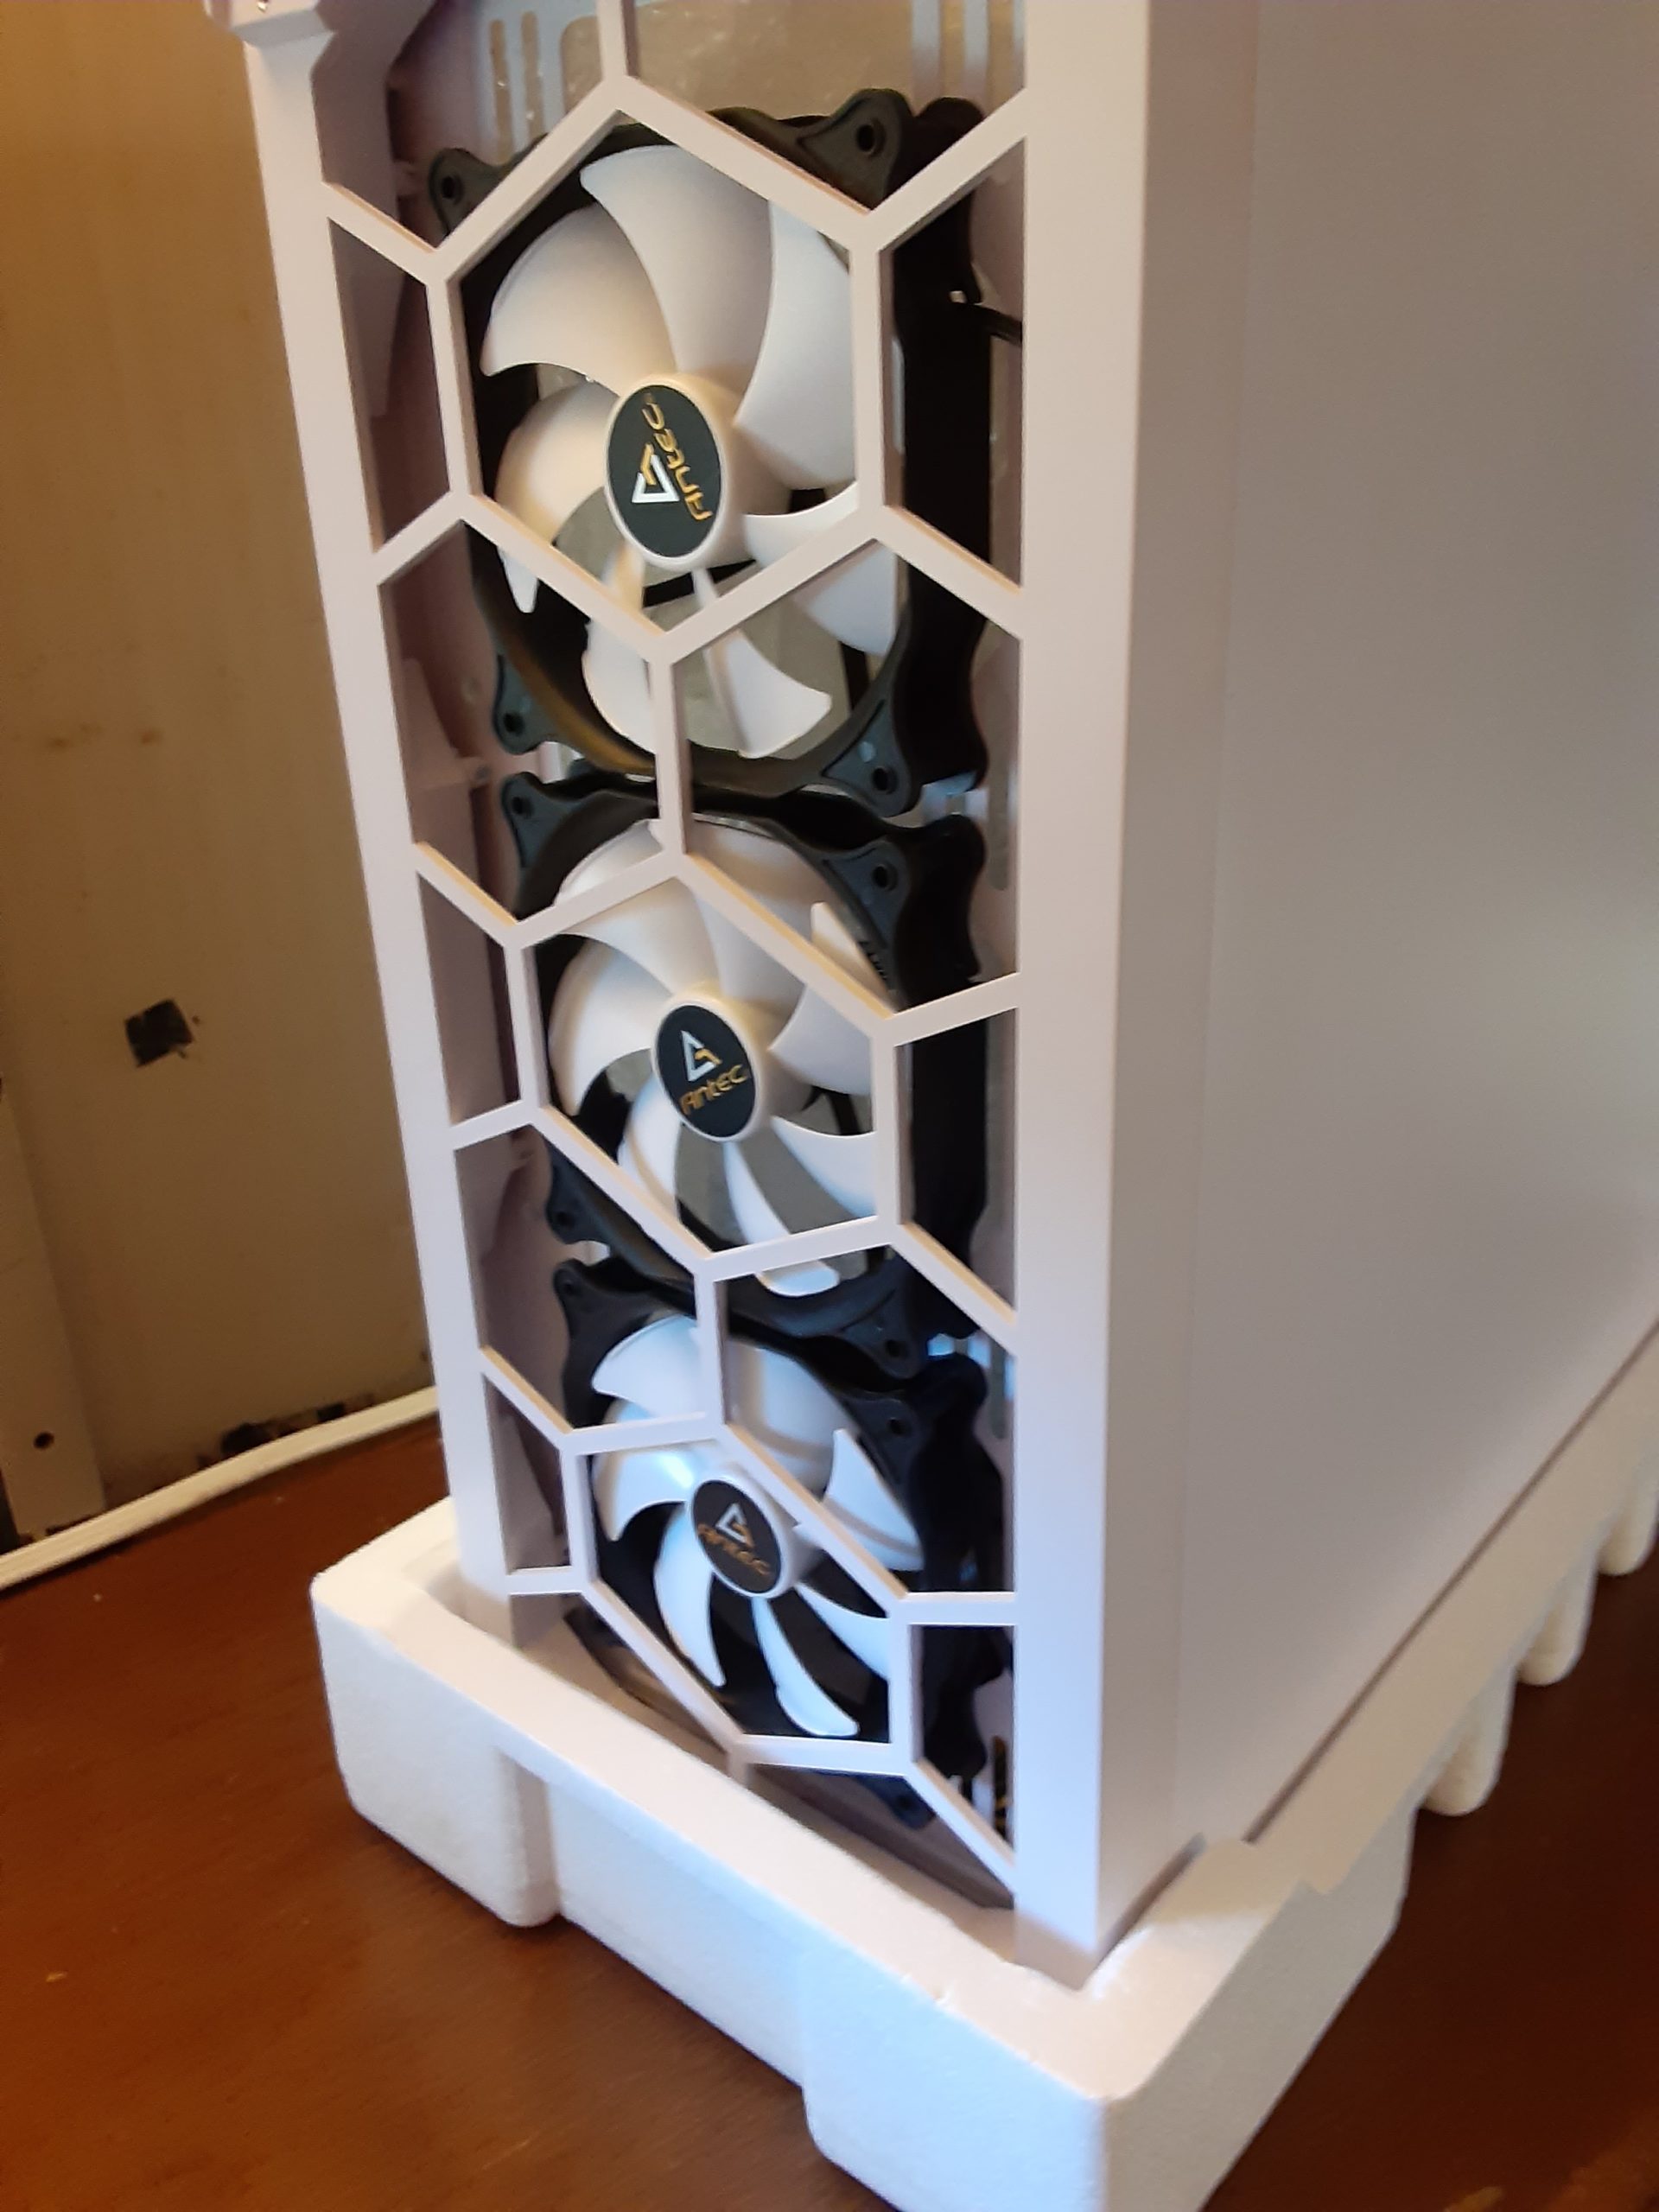
16. Make sure the front fans are clear. Remove the packing material that it’s sitting on.
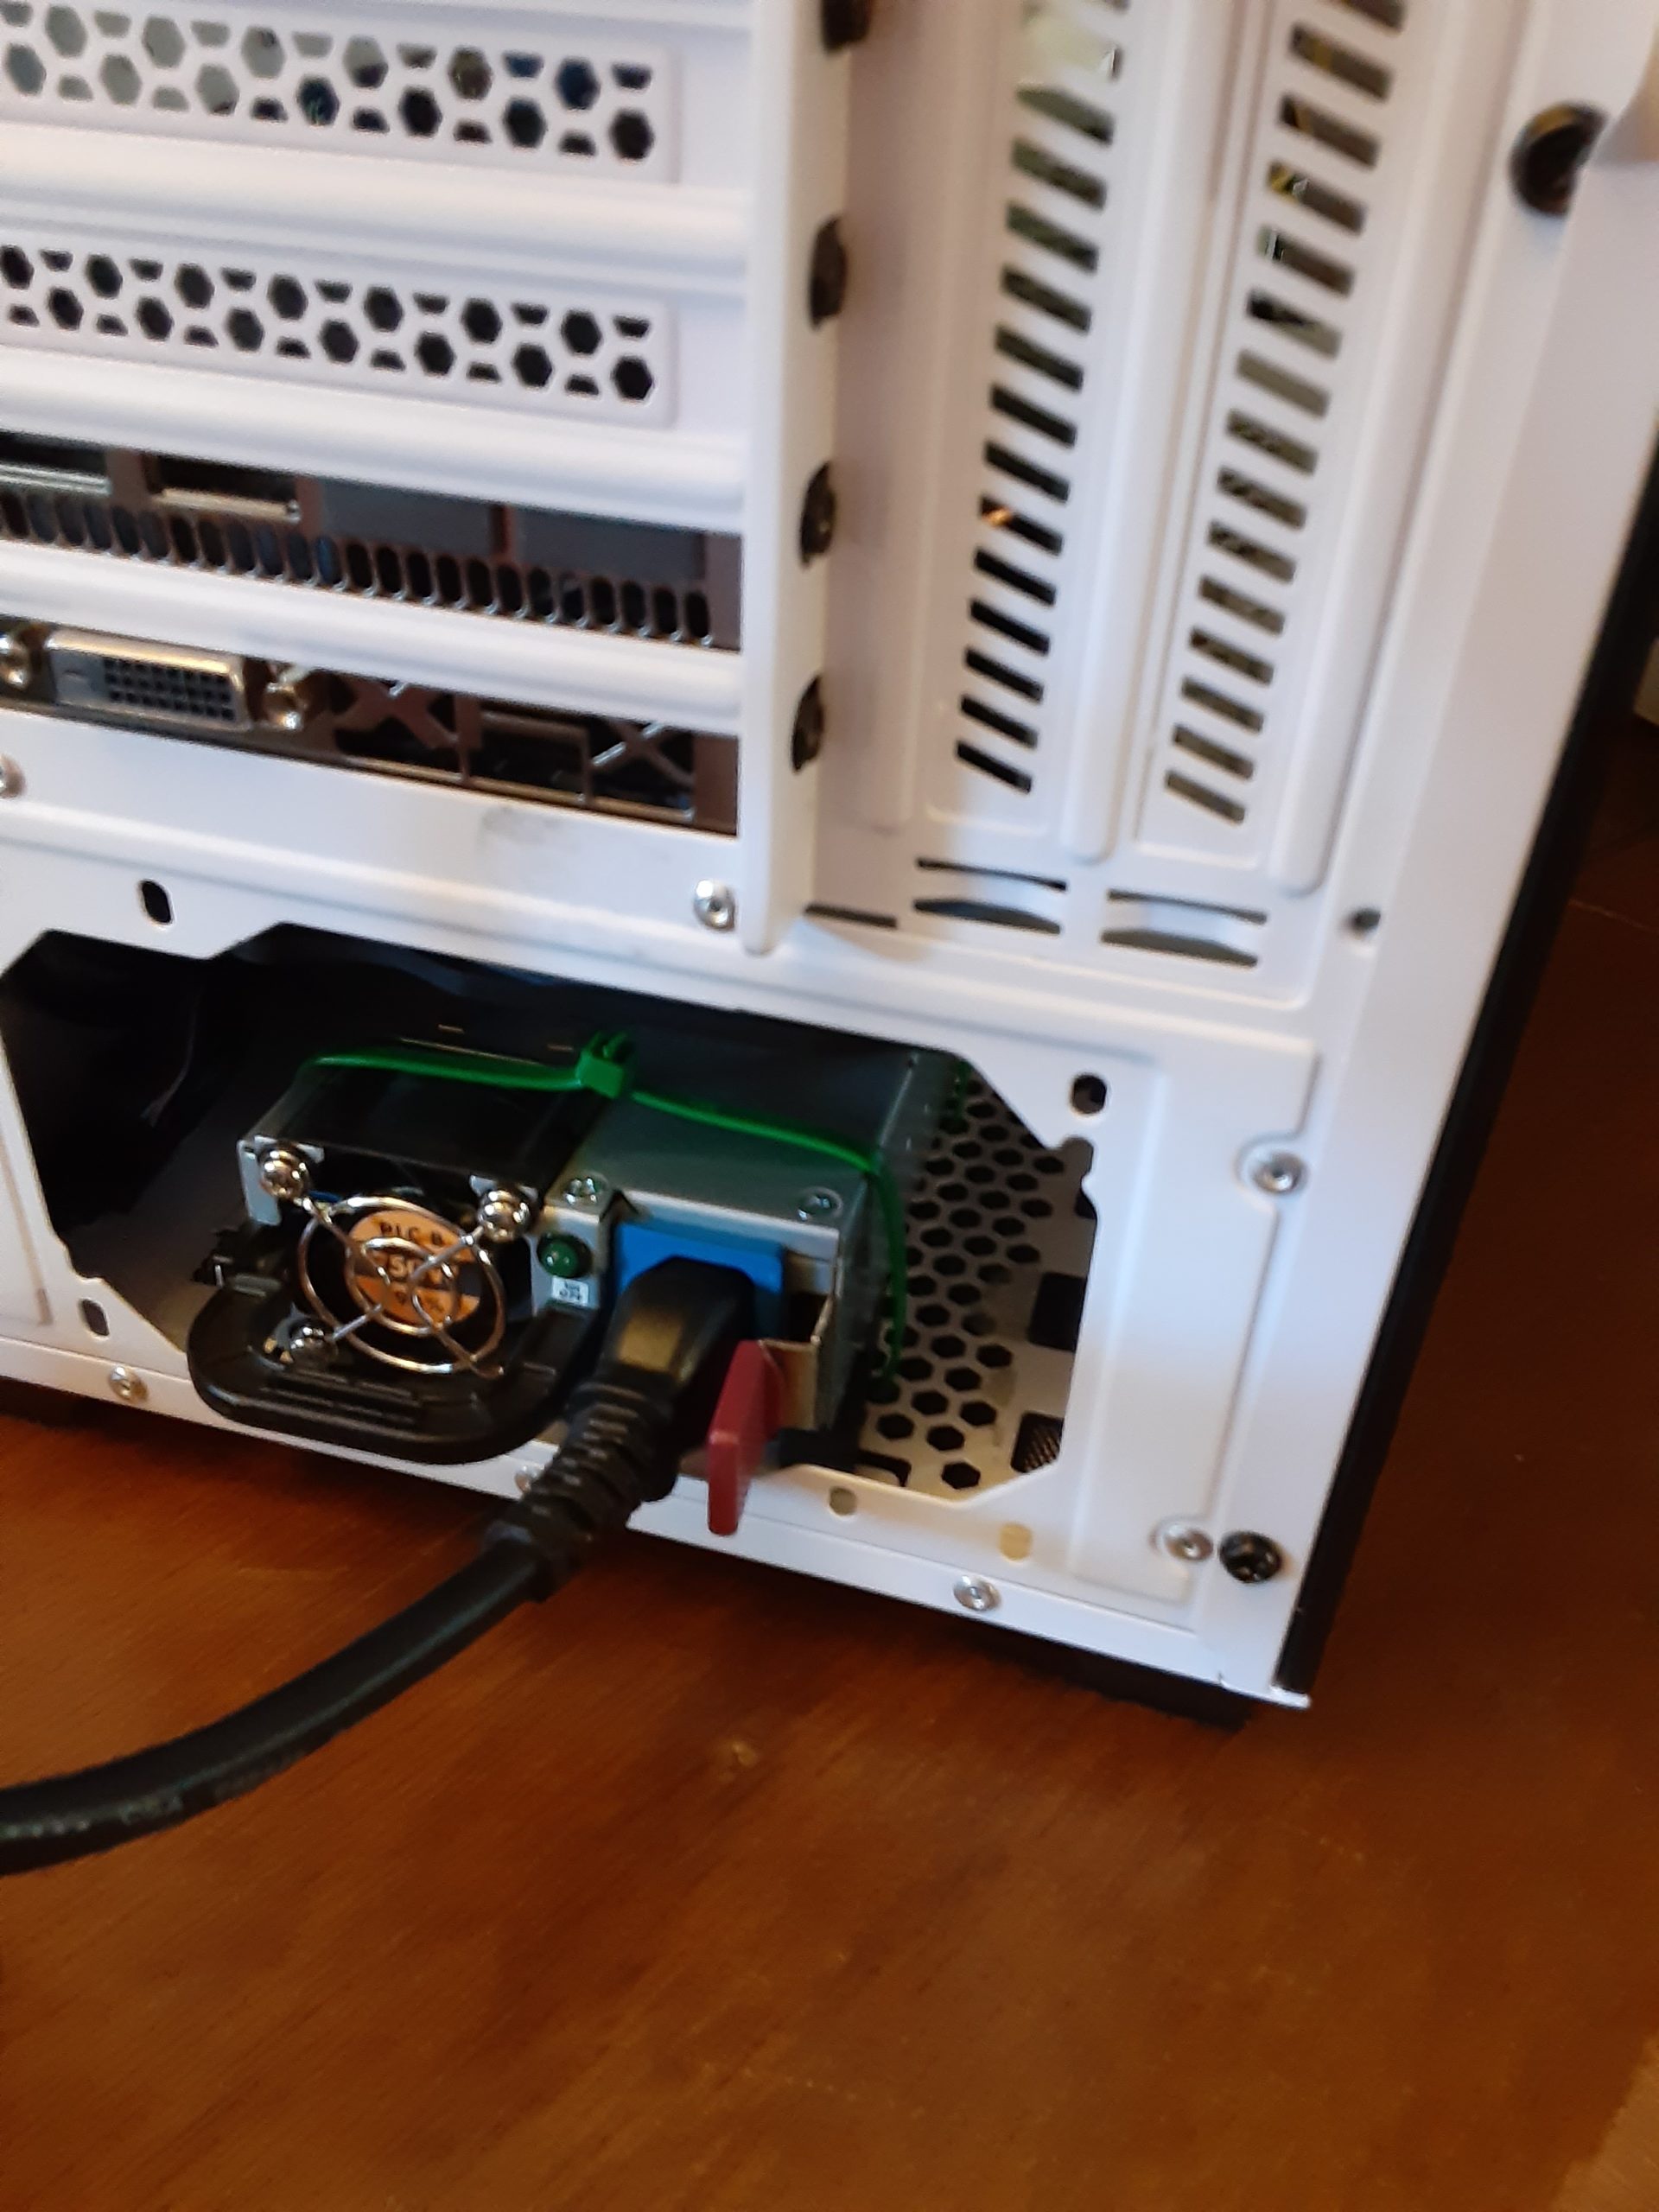
17. Plug in the short power supply cable at the bottom rear of the case. Wiggling it will help. Make sure it’s firmly seated. You can hold the small black handle for leverage.
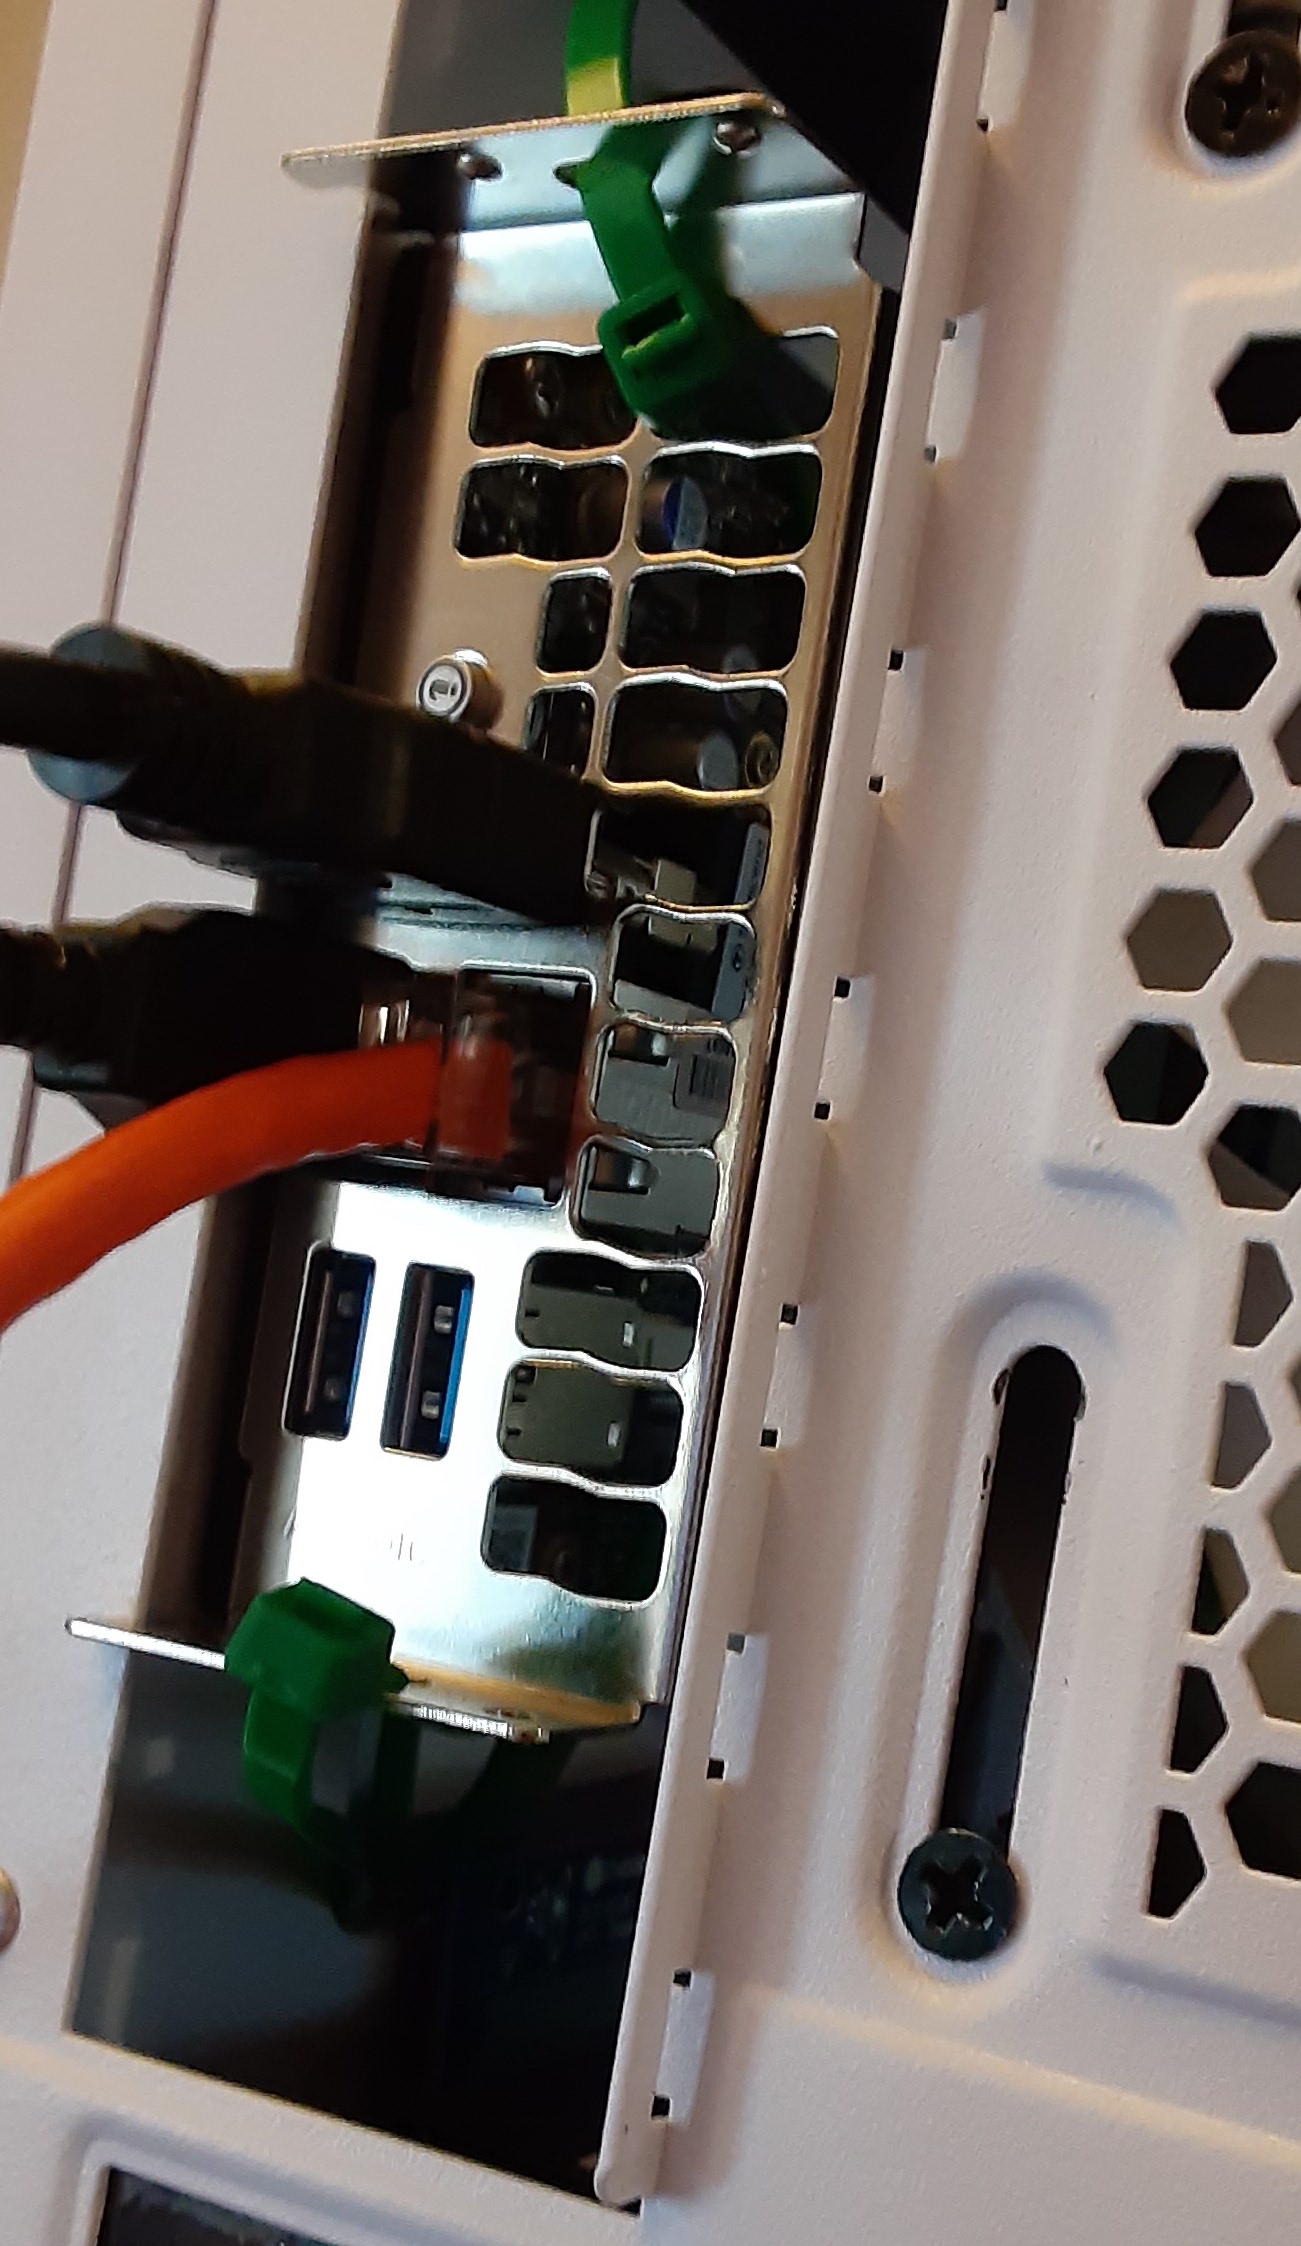
18. Plug the Ethernet cable into the motherboard as shown (the orange cable).
19. You won’t need the monitor or keyboard, but if, out of curiosity, you want to see what’s going on when the miner is powered up, they plug in as shown above.
20. The monitor and keyboard are supplied In Case of Emergency, which I would normally talk somebody through.
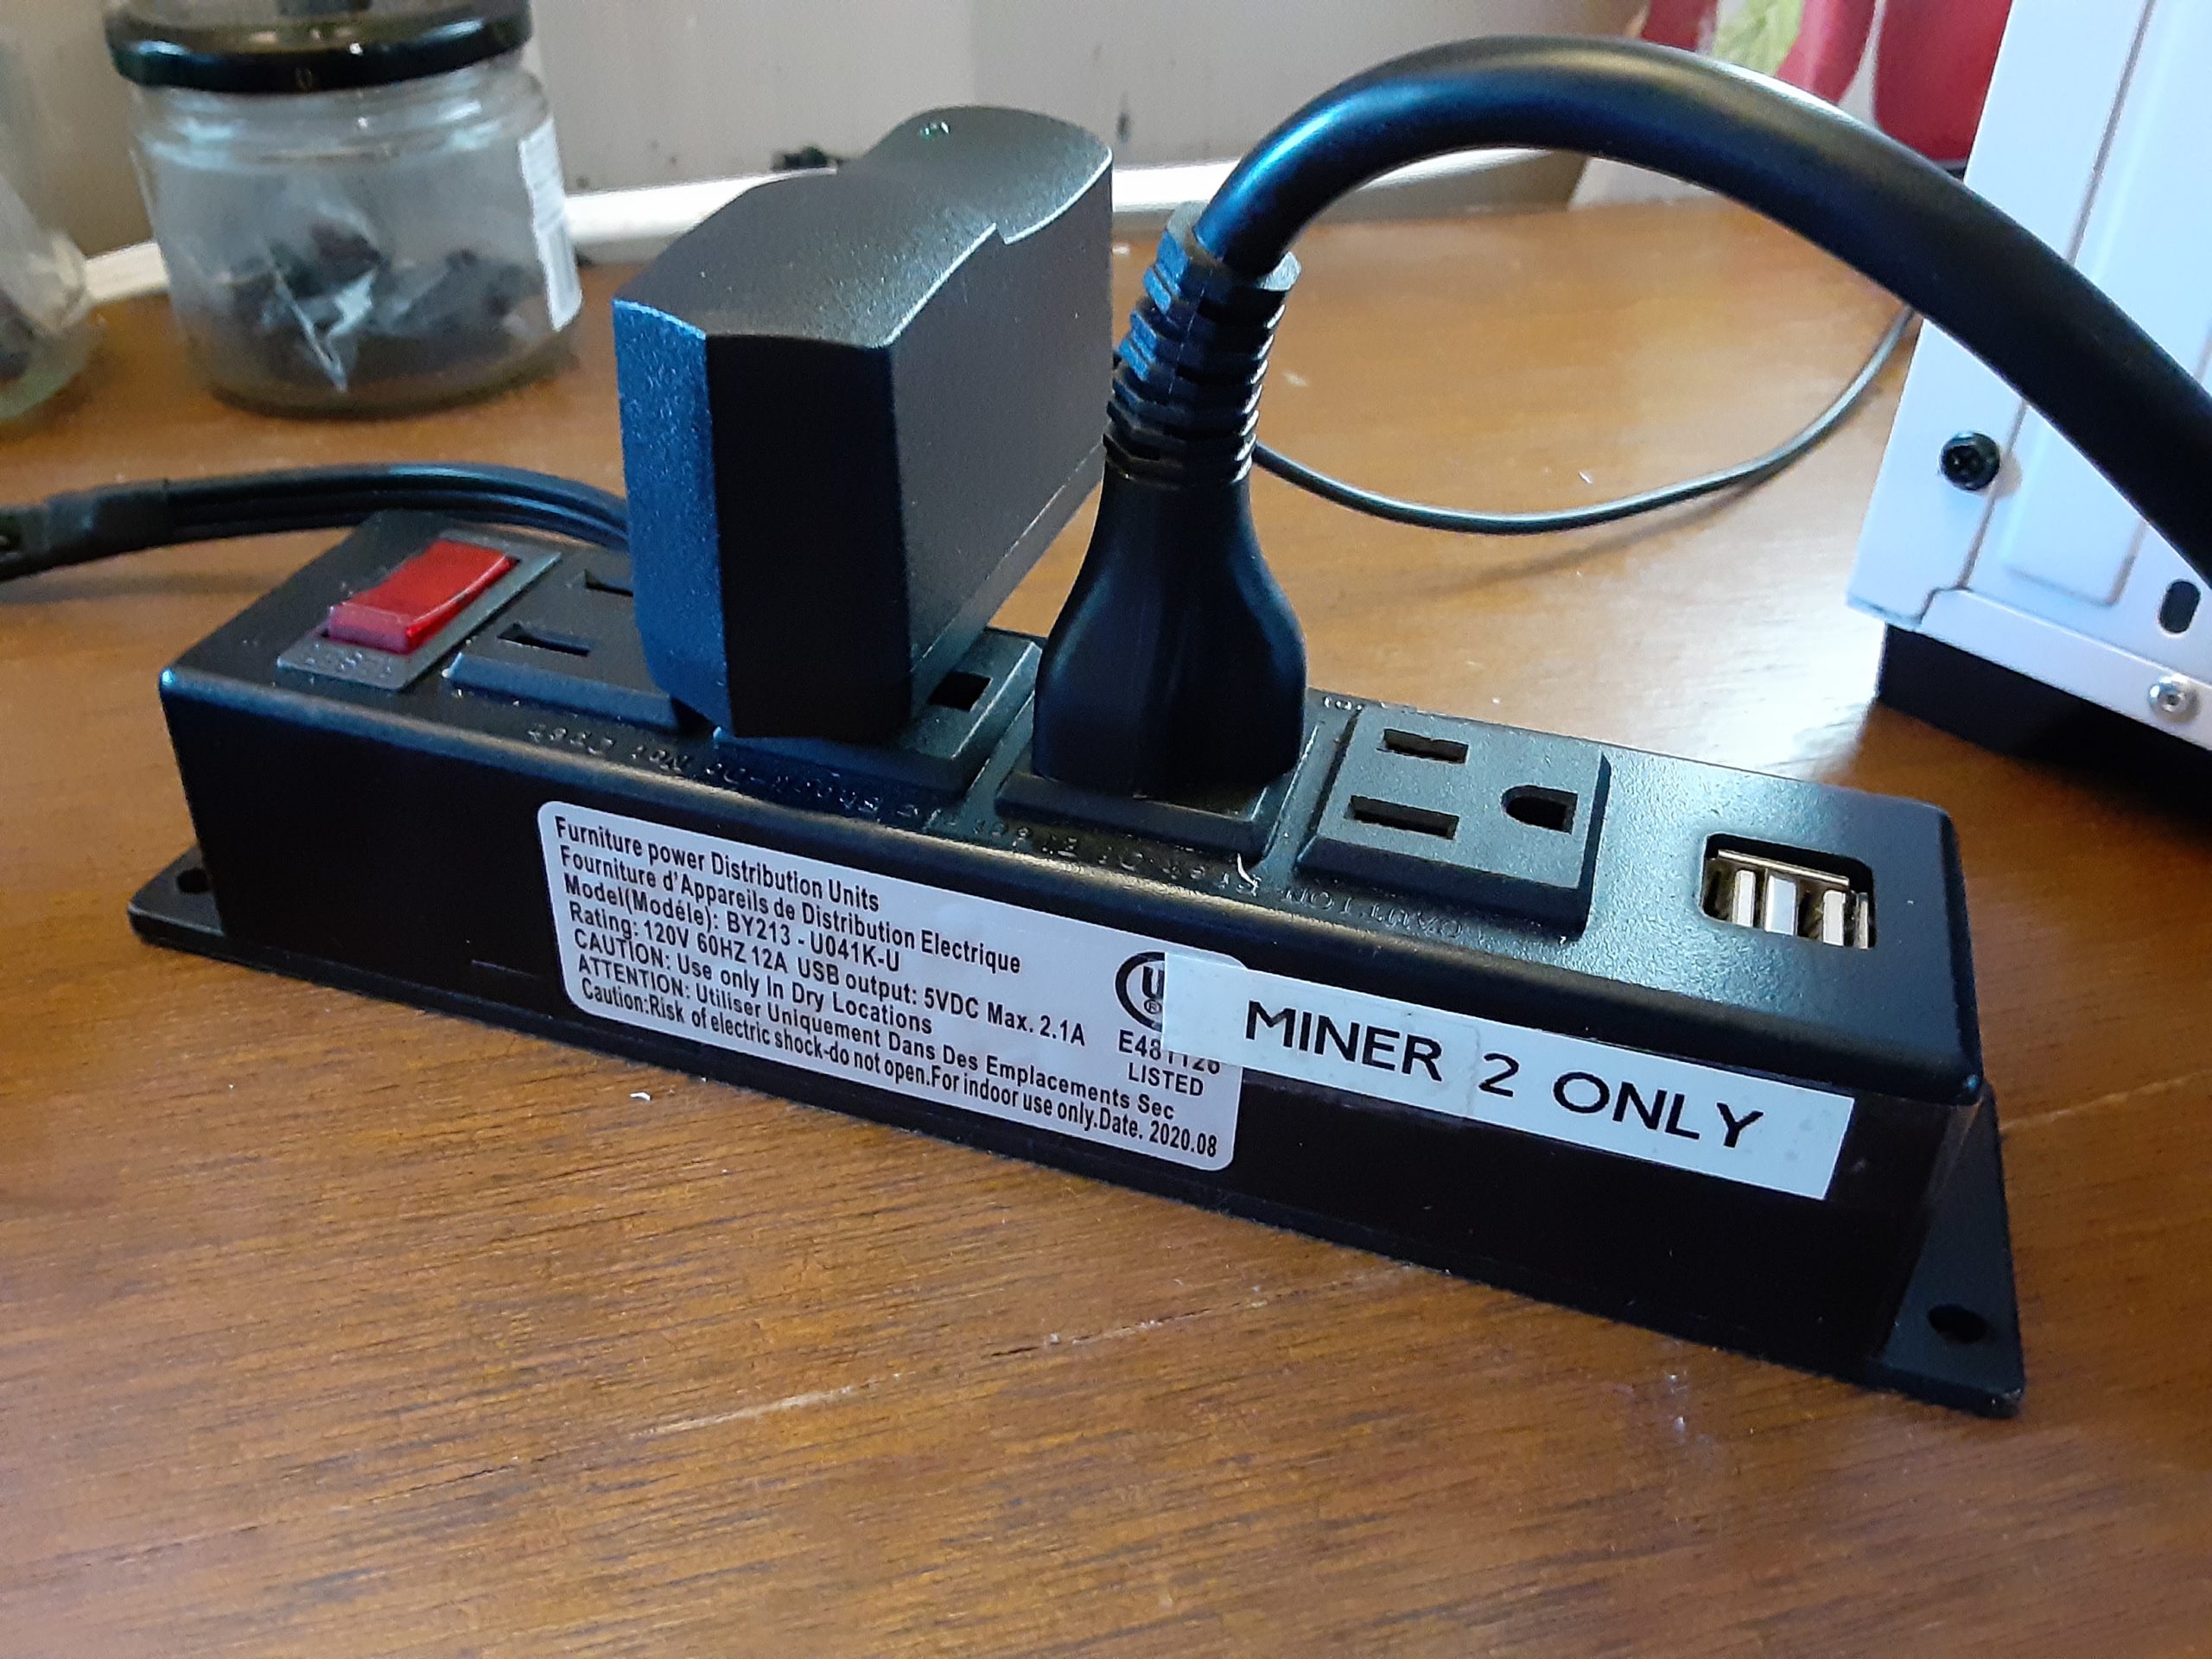
- Plug the power supply and optional monitor into the small surge protector.
- This surge protector serves as the power on / power off switch for the mining computer. I’ve programmed the motherboard and power supply to be Always On when power is present.
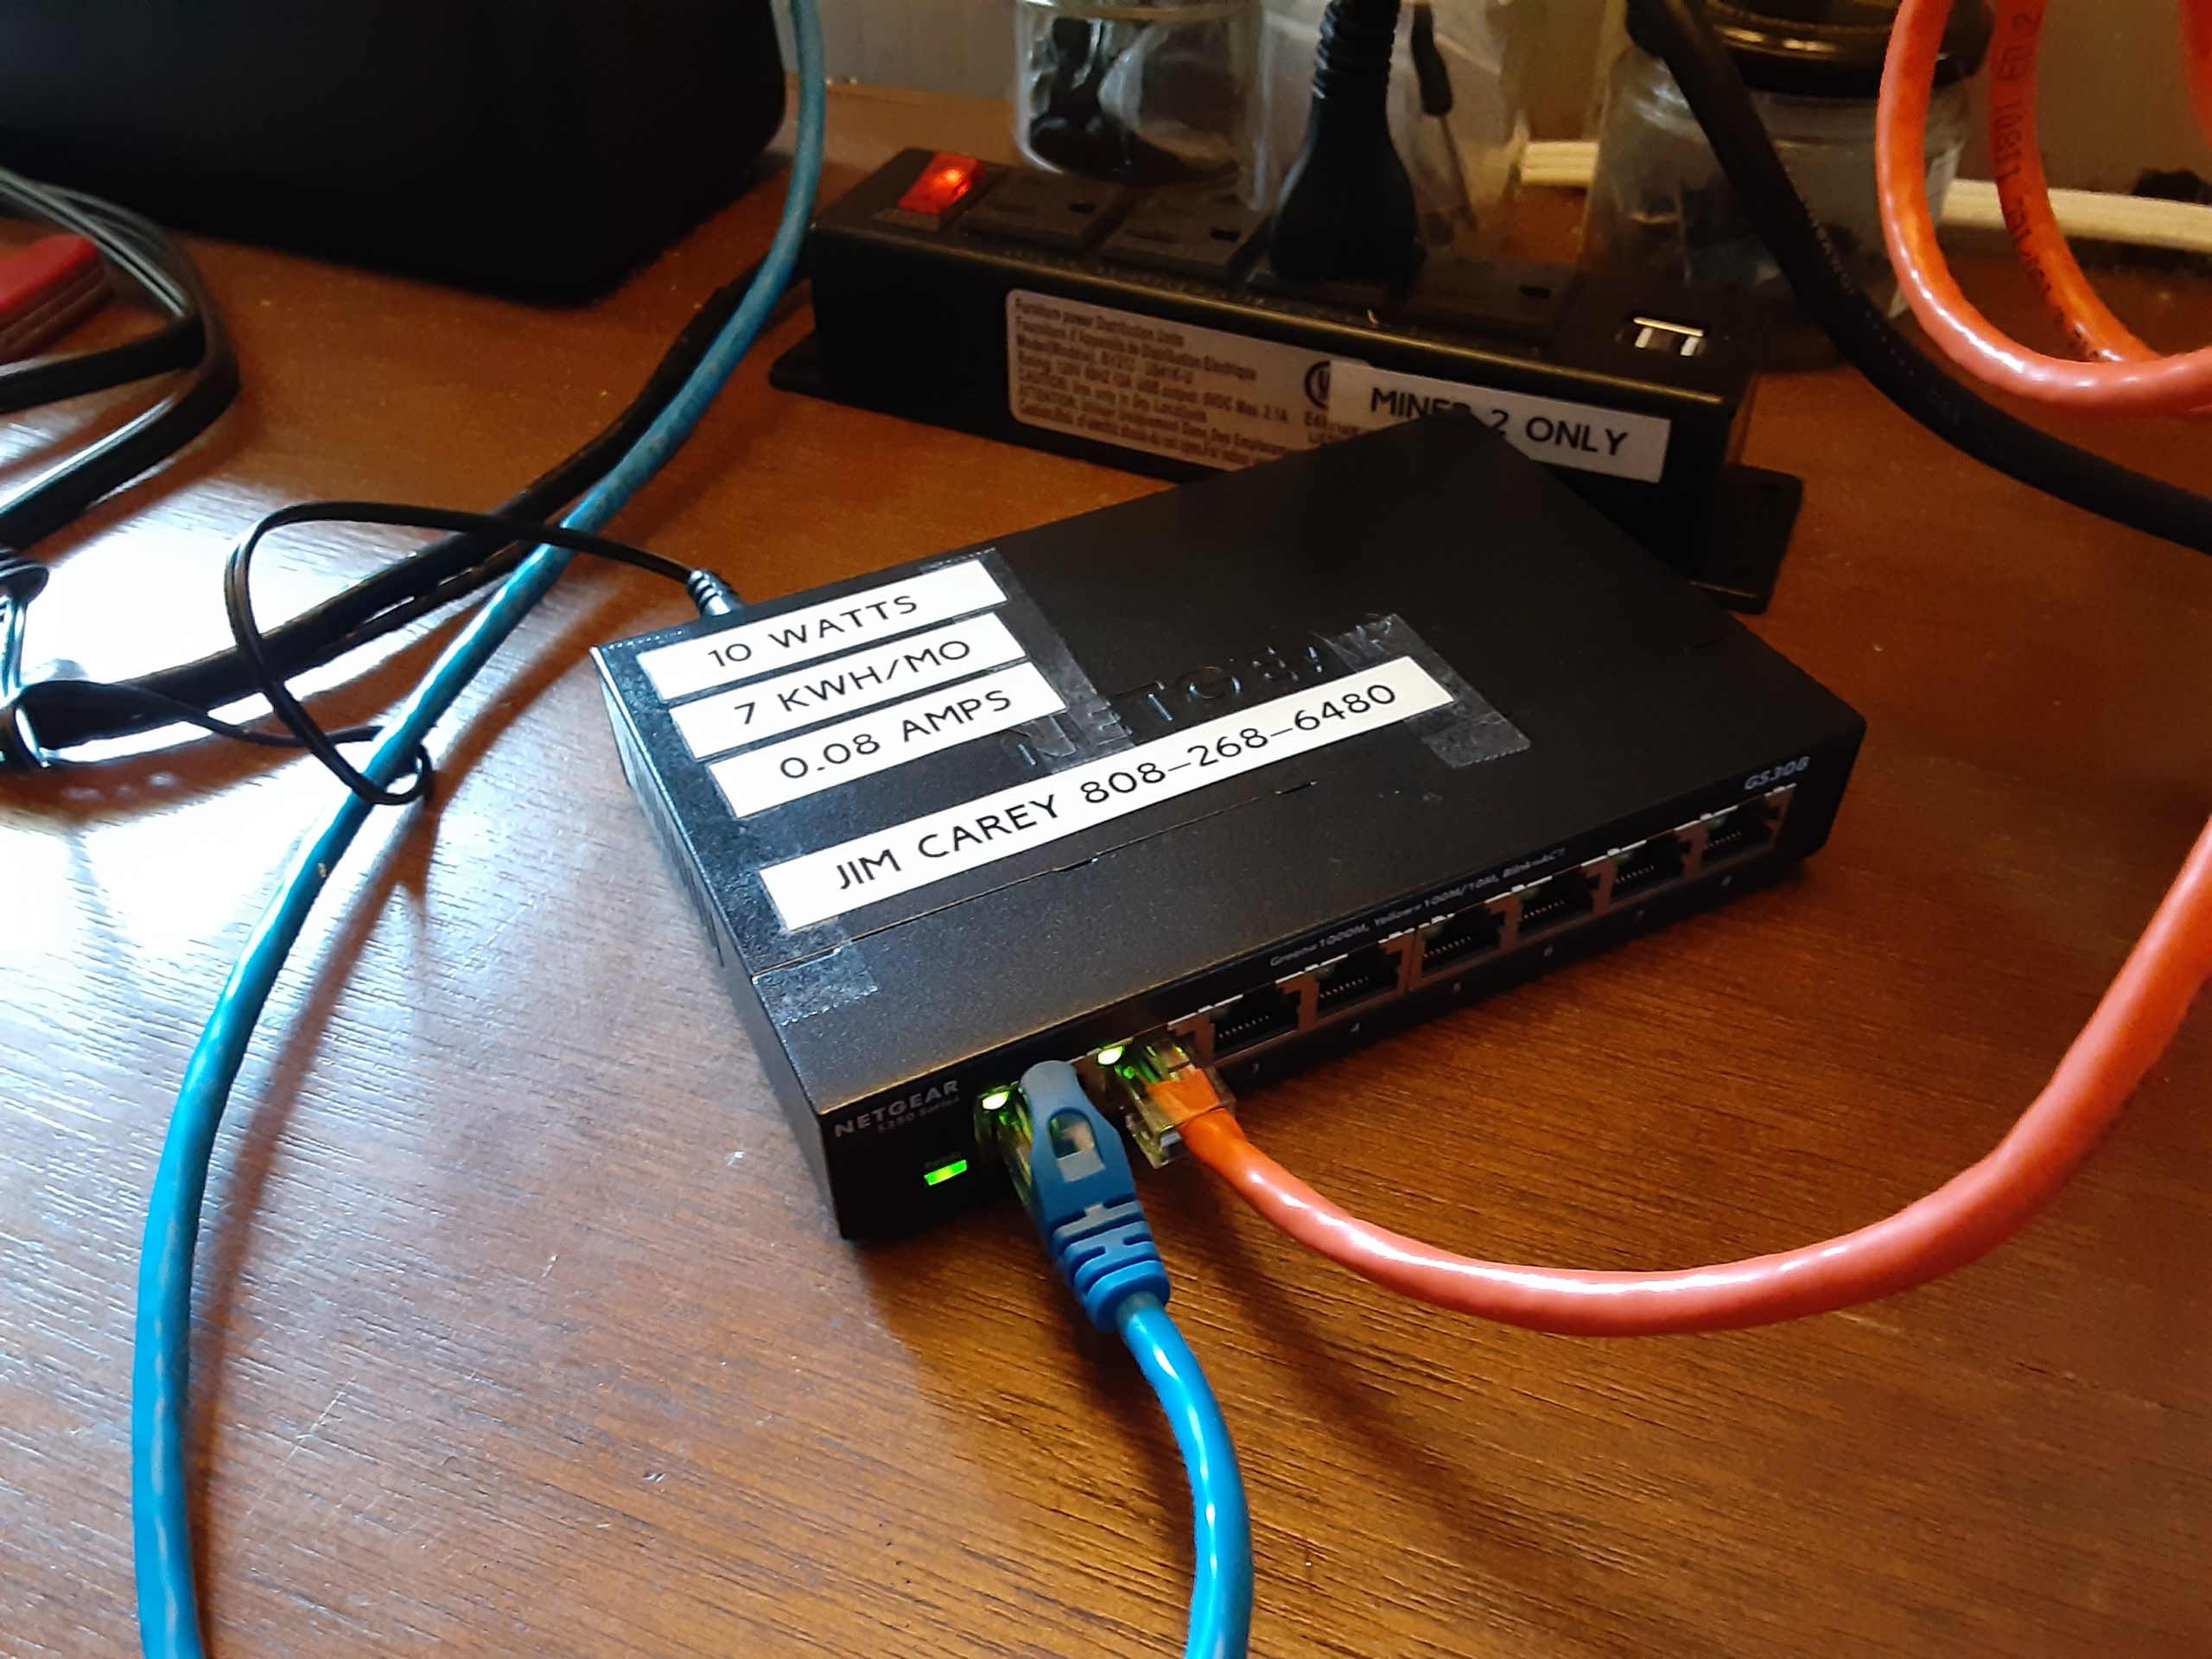
- Unbox the Ethernet switch. This is a switch, not a router, so no configuration is needed.
- Connect the Ethernet cable from your router (blue, in this example) into outlet port #1.
- Plug the miner’s Ethernet cable (orange, in this example) into outlet port #2.
- The rest of the Ethernet switch outlets can go to any computer.
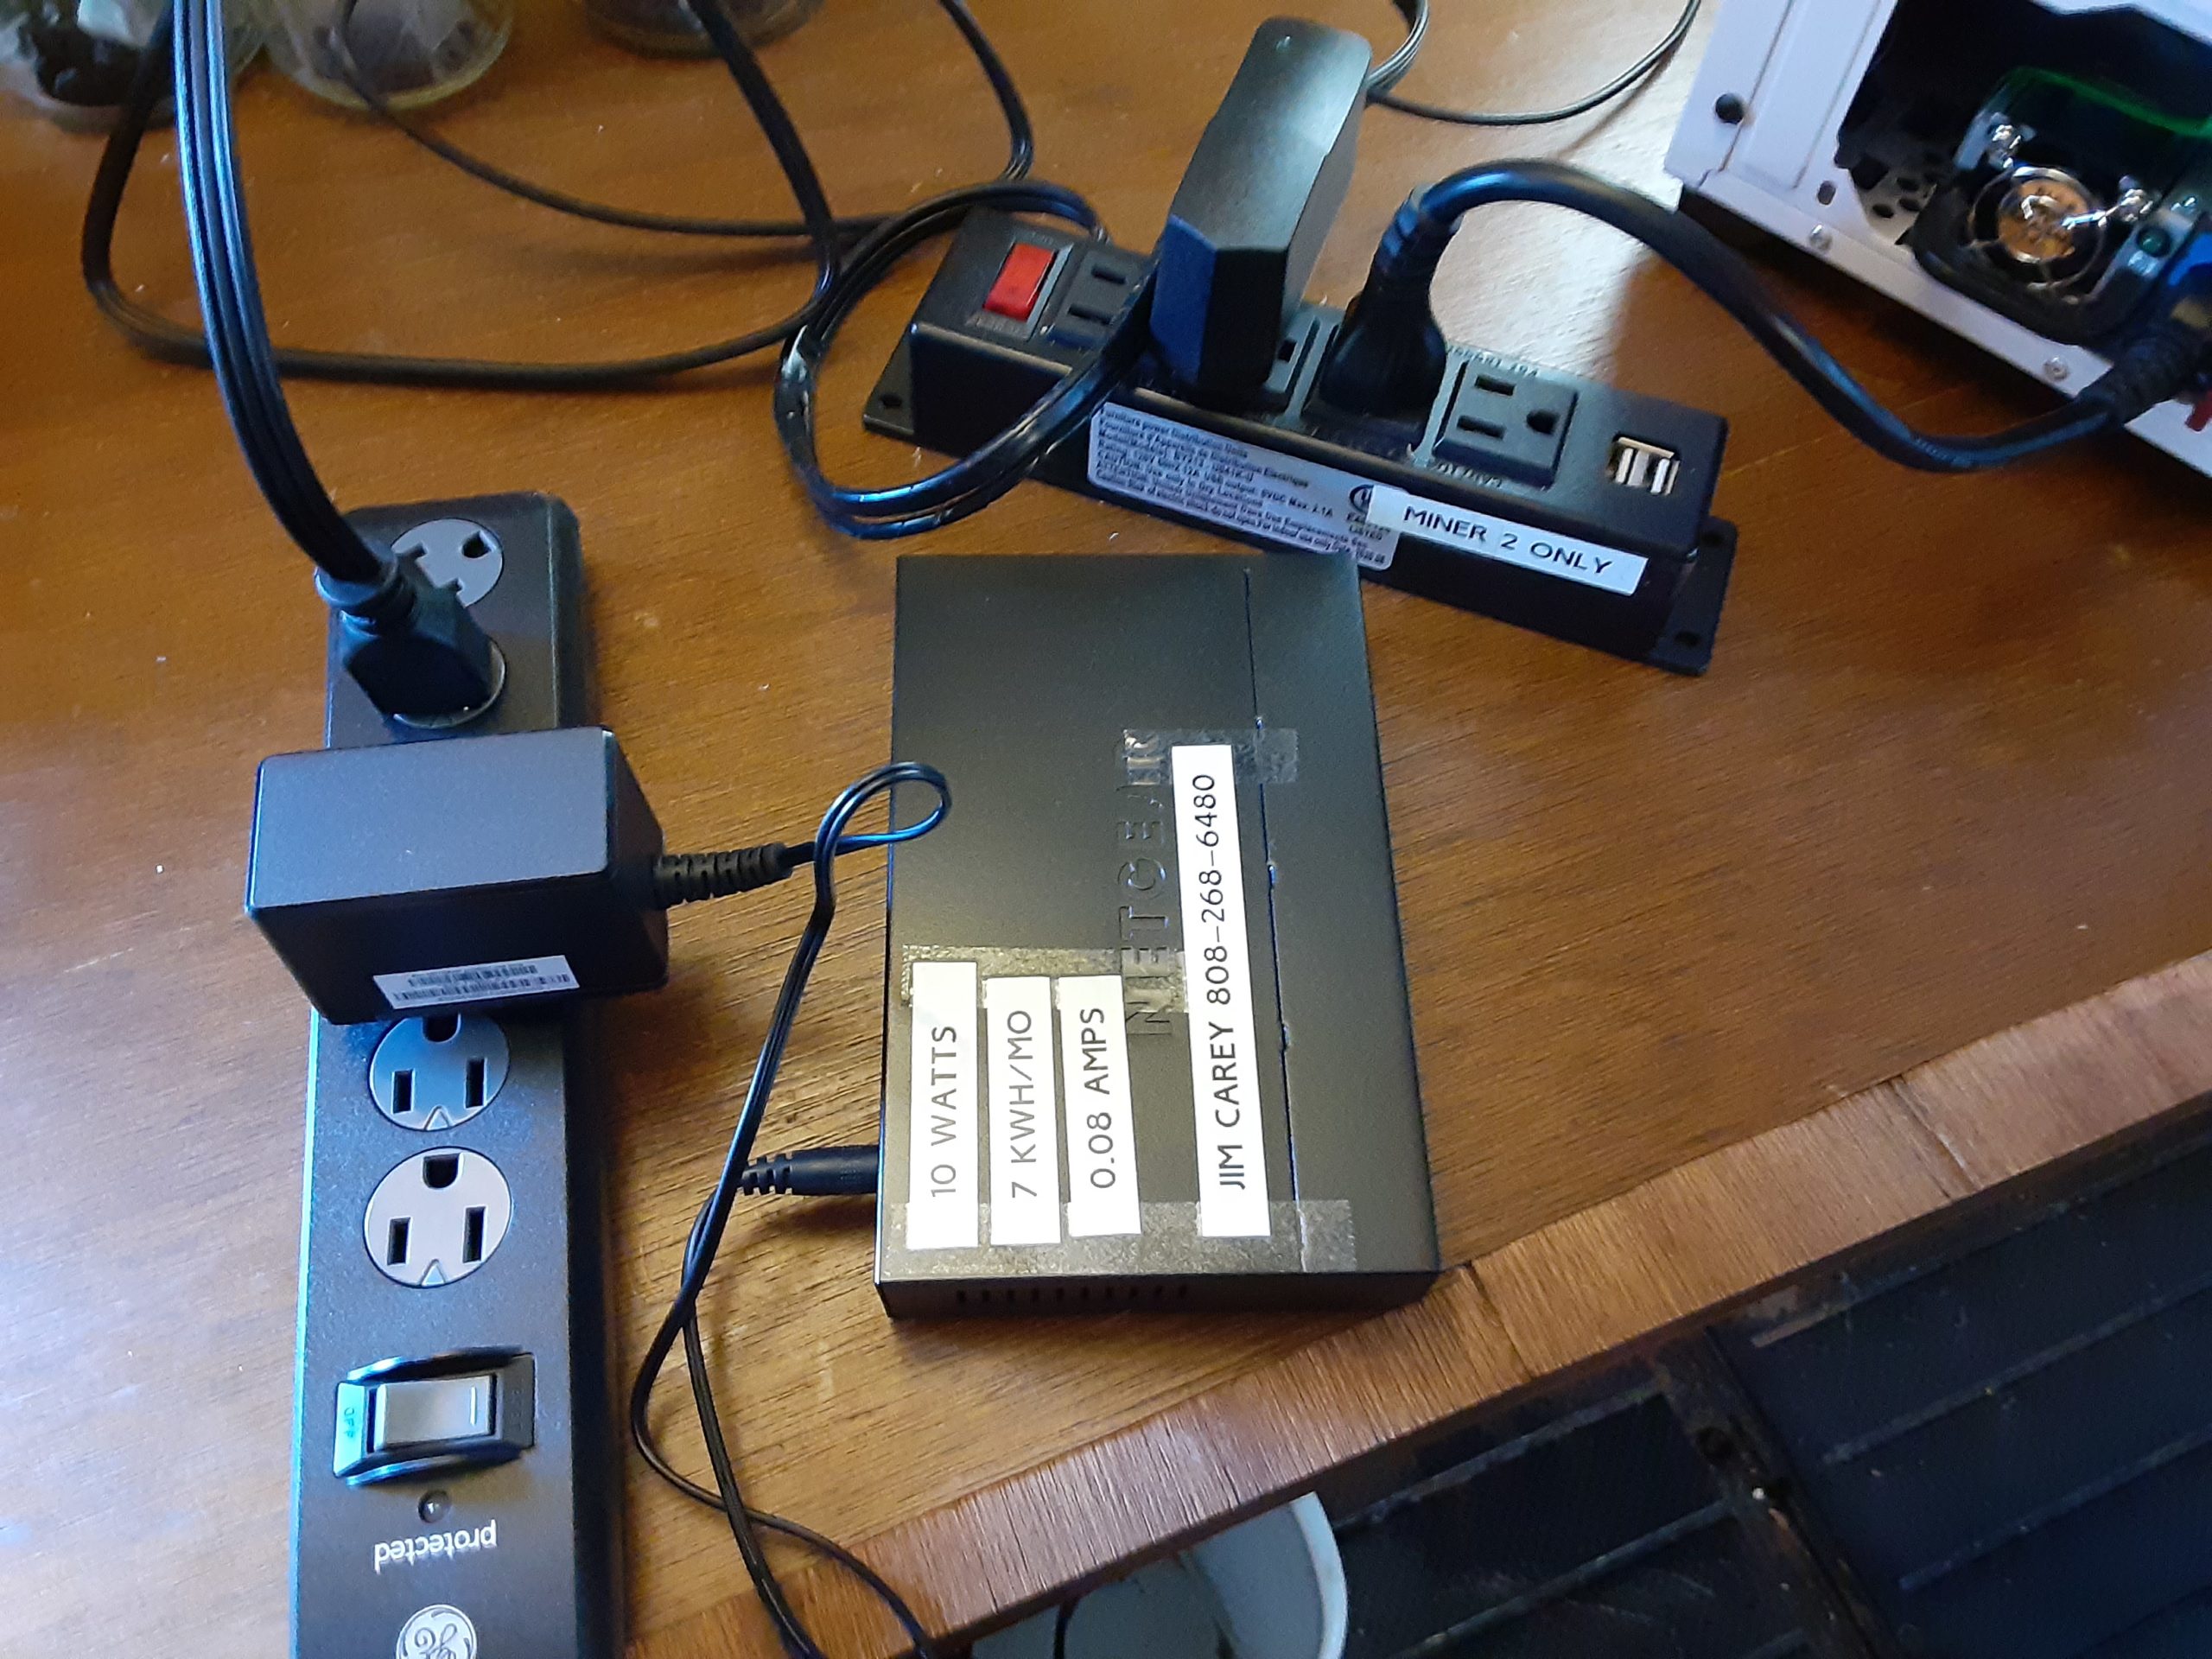
27. Plug the small Miner 02 surge protector and the Ethernet switch into the large, supplied, surge protector.
28. Please review the Troubleshooting Guide before proceeding (see below).
29. Plug the large surge protector to 110 volt AC power.
30. Turn on both surge protectors. The Ethernet switch should light up on the front, and lights should come on in the mining computer. ALL of the fans should spin up: Graphics card (GPU) fans, and the fans on the top, front, bottom and back of the case.
31. The fan on the back of the case blows outward, all other fans blow inward. All sides of the computer should be given good clearance for the best air flow.
32. Power consumption is denoted on the devices.
IF YOU HEAR ANY CLICKING OR TAPPING, TURN OFF THE SURGE PROTECTOR IMMEDIATELY!
Troubleshooting Guild
Clicking or Ticking Sound
A. Any tapping or clicking noise in the computer case means that a fan blade is rubbing against something. TURN OFF THE POWER IMMEDIATELY!
Investigate and try to discover the source. Otherwise, call Dr. Jim at 808-268-6480.
NO POWER
B. Verify that both surge protectors are plugged in, getting power, and turned On.
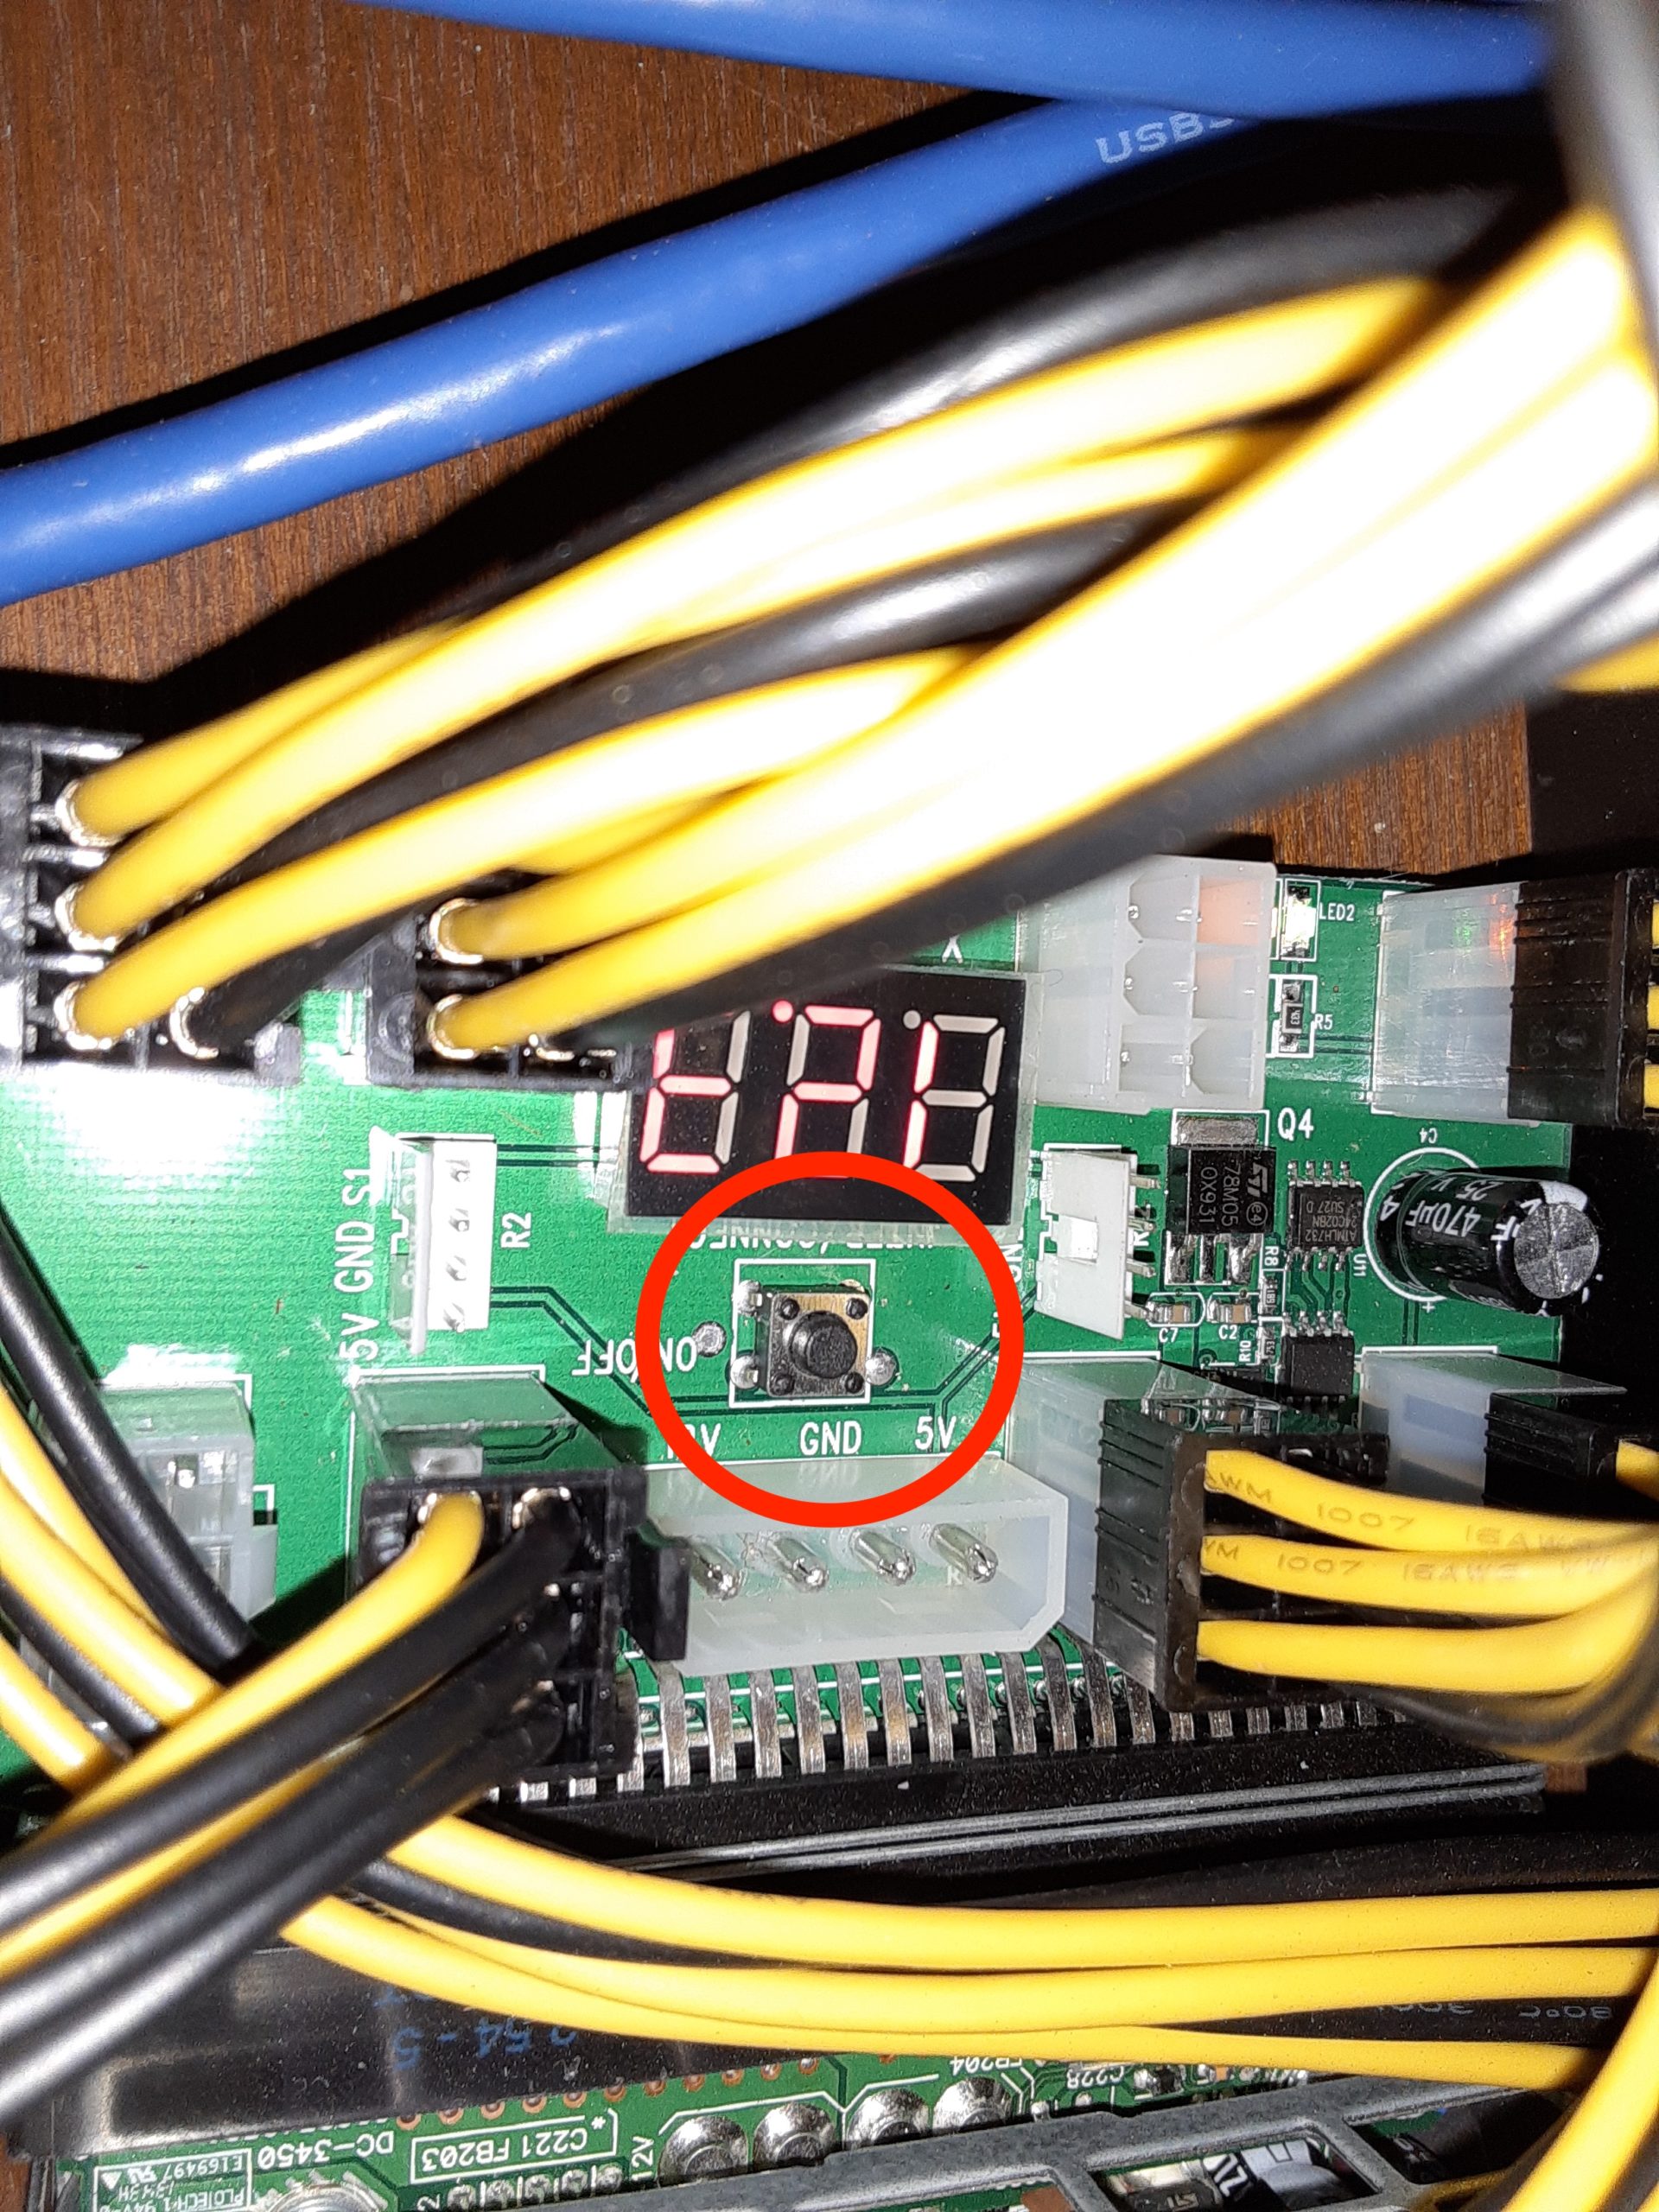
C. If you peer into the bottom of the case you should see some red LEDs that say 12.5. This is the power supply, and the on/off switch is the small black button in the above photo. The easiest way to get in and press this is to remove the metal panel side of the miner’s case (2 screws).
BE SURE all black and yellow wire connectors and the 110 volt AC power plug are fully seated.
Partial Power
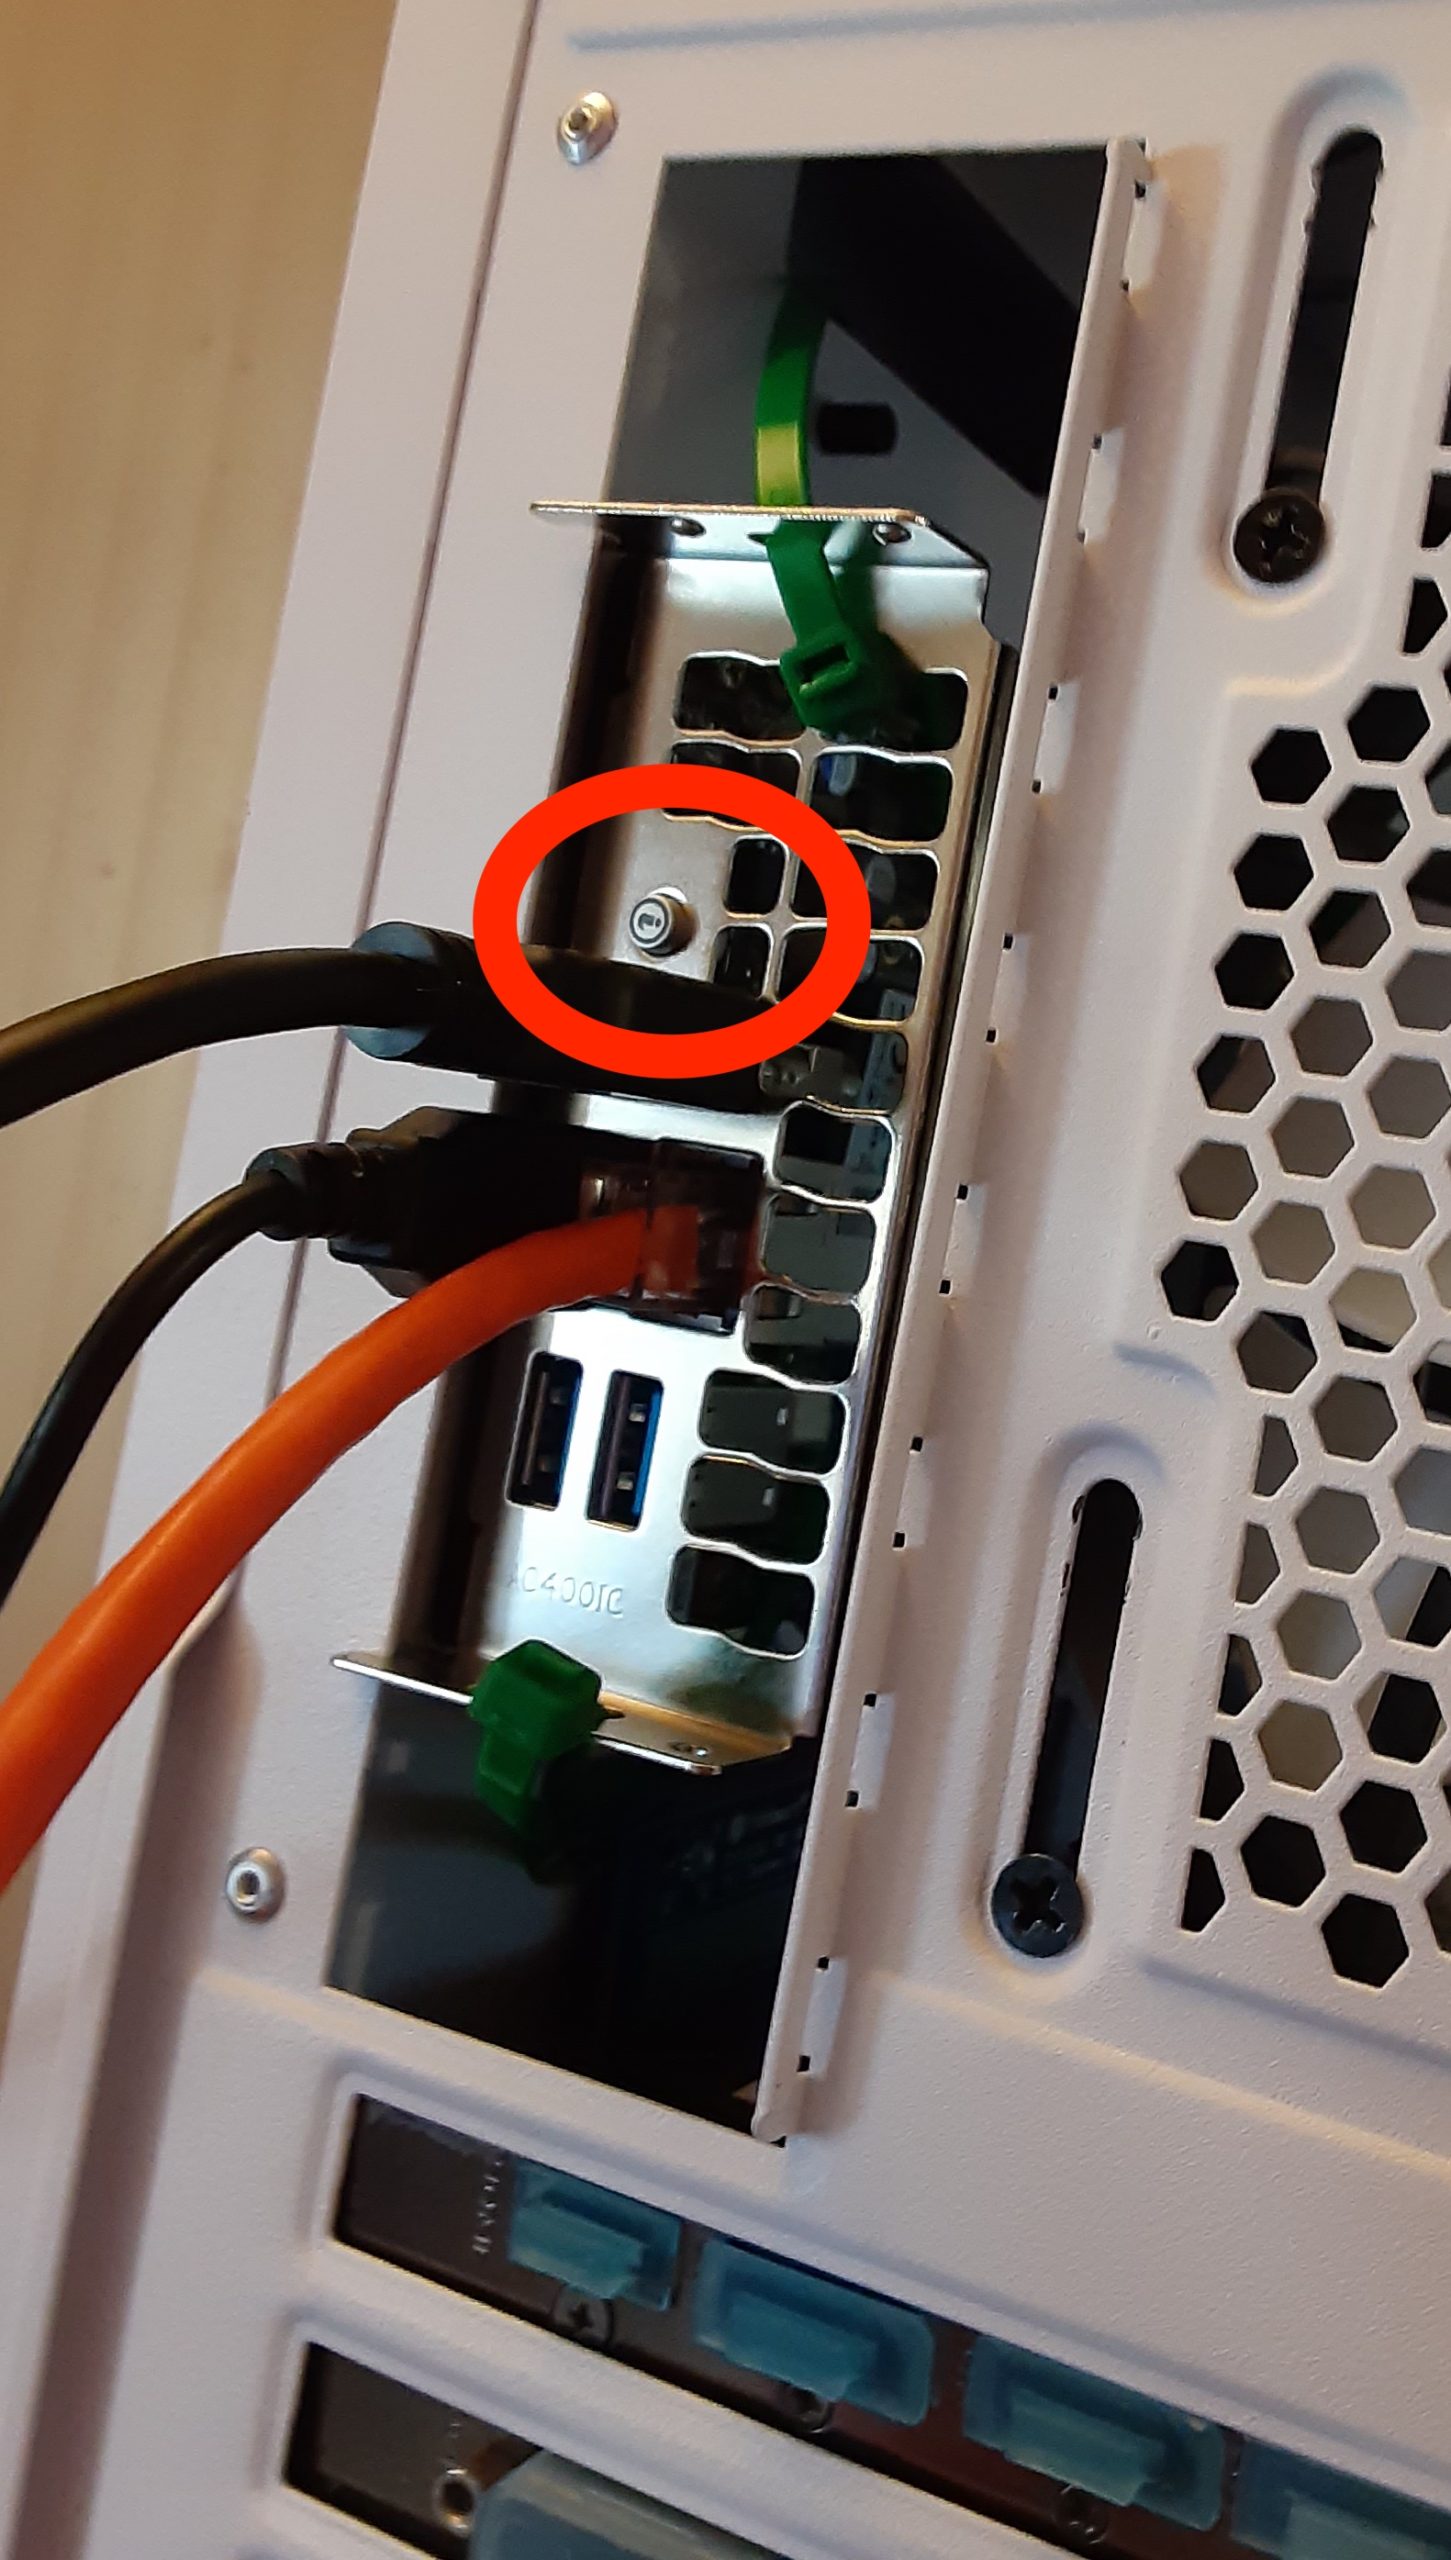
C. If you can see that the case fans power up, but the CPU fan on the Rebtech motherboard isn’t running, and there’s no light on the motherboard, then the motherboard is off. The power switch is on the back of the card above the HDMI port, which is above the Ethernet port, as marked in the above photo (click to zoom)
Other
D. It’s normal for the miner to run quite warm, about 20 degrees F above room temperature. I am constantly monitoring it remotely, and if any component gets above a certain temperature the entire rig will power off automatically.
E. I can control everything remotely except turning the power on.
All Other Issues
F. Turn off the power at the Miner 02 surge protector, unplug it, then email, text or call me. Mahalo! Thank you!
TECH SUPPORT
Dr. Jim Carey
call or text 808-268-6480
jimcarey@jimcarey.us
jimcarey@engineer.com
I’m on HST=GMT-10
Noon in Michigan is 6 am on Maui.
Related Documents
https://hawaiiactivitymarketing.com/miner-02-setup/
https://hawaiiactivitymarketing.com/miner-04-setup/
https://hawaiiactivitymarketing.com/flash-drive/